Mobile wallets
We offer four mobile wallets:
Apple Pay
The Apple Pay mobile payment and digital wallet service enables customers to make payments in person, in iOS apps, and on the web. It is supported on the iPhone, Apple Watch, iPad and Mac.
Prerequisites
To enable Apple Pay for your customers, you will need an Apple Developer account. This account must be associated either with the Apple Developer Program or the Apple Developer Enterprise Program.
Your shoppers can only see Apple Pay as a payment option if they:
Use an Apple Pay-compatible device
Use the Safari browser if they are paying on the web
Are located in a country or region where Apple Pay is available
How it works
The transactional flow is in the diagram below:
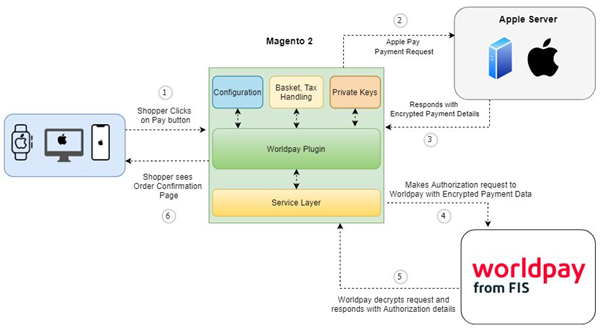
Here's what happens in above diagram:
The shopper places the order.
Magento requests the encrypted payload from Apple Pay.
Apple Pay returns the encrypted payload after authentication.
Magento sends an XML Direct request for authorization to Worldpay, containing the encrypted Apple Pay data.
Worldpay sends the payment response to Magento.
The Magento plugin informs the shopper of the outcome.
Implementation steps
Create your Apple merchant ID (e.g. merchant.com.worldpay.merchantAccount) then log in to your Worldpay merchant account.
Switch to the mode you will use (test or production).
Select Integration from the left-hand menu and Apple Pay in the top menu. You can see these details in the screenshot below:

Enter your Apple merchant ID and click Generate (if not generated already). Now you can see the certificate signing request (CSR) that you generated. Download the CSR file so you can create your payment-processing certificate.
Enable Apple Pay on the Apple developer website.
Create a payment processing certificate on the Apple developer website, but please note the following:
Make sure you enter the Apple merchant ID you created in step 1
Skip the step in which you create an Apple-generated CSR
Instead, select the Worldpay CSR you generated step 1
Download and save the payment processing certificate you generated (.cer file)
When you have completed the steps on the Apple developer website, send the payment processing certificate you downloaded to Worldpay. You'll then need to wait until Worldpay confirms that the certificate is activated.
Register and validate your merchant domain with Apple, making sure to use the Apple merchant ID you created in step 1.
Create a merchant identity certificate.
For each transaction you must request a session from Apple using your merchant identity certificate.
When you create your Apply merchant identity certificate:
When asked for your merchant ID, make sure you enter the Apple merchant ID you created in step 1
Follow the instructions from Apple for creating a CSR yourself.
Generate a CSR
You cannot create a merchant ID certificate using the CSR you generated from Worldpay. Instead generate a CSR of your own and use that to generate the merchant ID certificate. To do this:
Download and save the generated merchant ID certificate (.cer file).
When you have completed the instructions from Apple, add the merchant ID certificate to your keychain.
When you create your own CSR, you may also get a private key. Use your key chain app to add this private key.
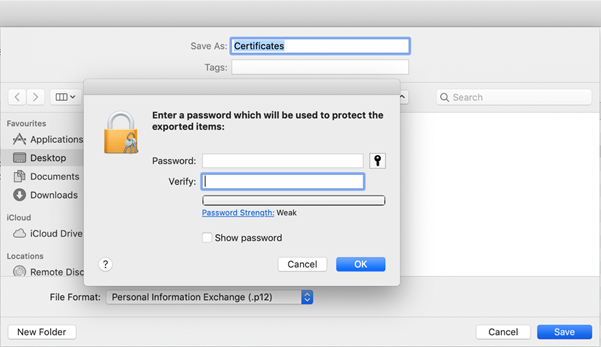
Export the merchant ID certificate from your keychain as a p12 file (see screenshot below).

Make a note of the password you entered in the field below:
Now use this command to convert your p12 file to a PEM file:
openssl pkcs12 -in ApplePayMerchantIdentity_and_privatekey.p12 -out ApplePay.crt.pem -clcerts -nokeysopenssl pkcs12 -in ApplePayMerchantIdentity_and_privatekey.p12 -out ApplePay.key.pem -nocertsWhen you generate these files you may be asked for your password. If so, use the password you used in step 5. Upload both files to your server: eg, /var/www/html/apple-certs/
Use the following commands to verify the files:
openssl x509 -noout -modulus -in ApplePay.crt.pem | openssl md5openssl rsa -noout -modulus -in ApplePay.key.pem | openssl md5The output of both commands should be the same. If the output of both commands is not the same, double-check that you have followed all the previous steps accurately. If both outputs are the same, then Apple Pay is enabled.
Configure Apple Pay
To configure Apple Pay, do the following:
Go to Magento Admin/Stores/Configurations/Sales/Worldpay.
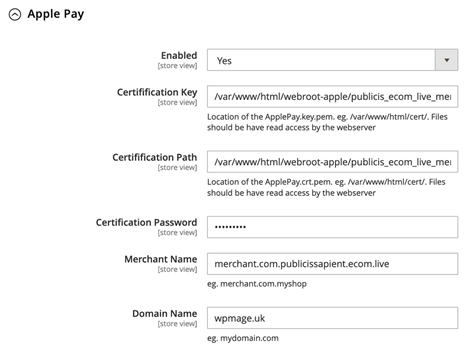
The Apple Pay configuration is in the Wallets section. Complete and save these configurations, as shown below. When you have finished, shoppers can use Apple Pay at the checkout.
| Configuration | Description |
|---|---|
| Wallet Enabled and Title | If set to Yes, the wallet section is available at checkout to enable payment by Apple Pay, Google Pay, etc. The shopper sees the title you enter as the heading for the Mobile Wallets section. |
| Enabled | When set to Yes, Apple Pay is available at the checkout. |
| Certification Key | The path of the certification key (pem) file in the server. |
| Certification Path | The path of the certification CRT (pem) file in the server |
| Certification Password | Your certificate's password. |
| Merchant Name | Your Apple merchant ID. |
| Domain Name | The domain name you registered with Apple. |
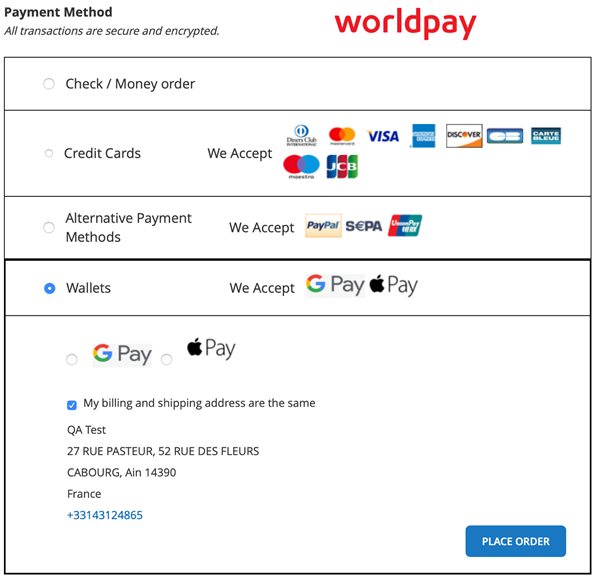
At checkout, customers see the Apple Pay option as in the screenshot below:
Google Pay
Google Pay lets your customers pay with a single click, using payment methods saved in their Google account.
The transactional flow is in the diagram below:
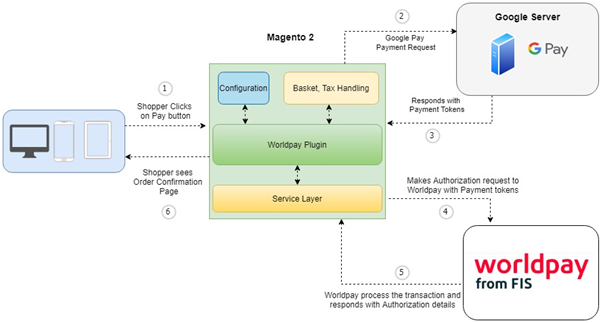
Here's what happens in above diagram:
The shopper places the order.
Magento requests the payment token from Google Pay.
Google Pay returns the payment token.
Magento sends an XML Direct request for authorization to Worldpay, this request contains the payment token.
Worldpay sends the payment response to Magento.
The Magento plugin informs the shopper of the outcome.
Configure Google Pay
To configure Google Pay, do the following:
Go to Admin/Stores/Configuration/Sales/Worldpay/Mobile Wallets.
The Apple Pay configuration is in the Mobile Wallets section. Complete and save these configuration settings, as shown below. When you have finished, shoppers can use Google Pay at the checkout.
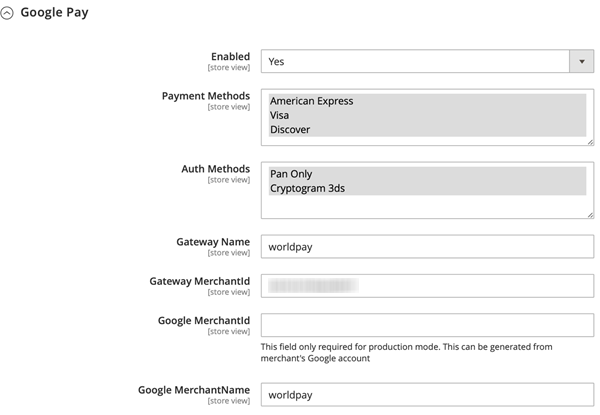
The highlighted fields indicate that you can select multiple items.
| Configuration | Description |
|---|---|
| Enabled | When set to Yes, Google Pay is available at the checkout. |
| Payment Methods | Supported credit cards. |
| Authentication Methods | PAN_ONLY: Personal account number. CYRPTOGRAM_3DS:3D Secure authentication. |
| Gateway Name | Set this to Worldpay. |
| Gateway MerchantId | Your Worldpay merchant ID. |
| Google MerchantId | Your Google merchant ID. |
| Google MerchantName | You can configure this in your Google merchant account. |
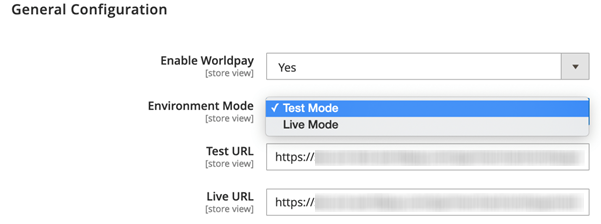
To change between test and production environments, go to the General Configuration section, see the screenshot below:
Shopper journey
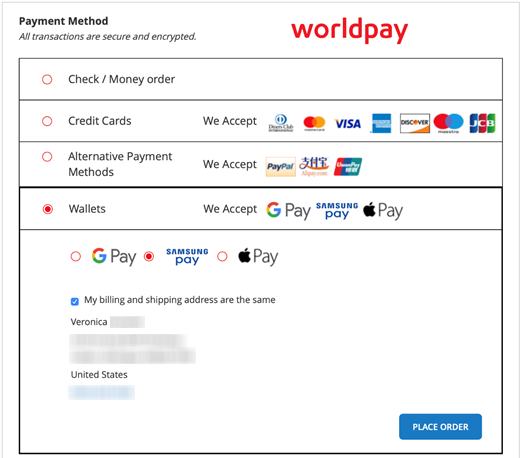
Once Google Pay is enabled, shoppers see it as an option at checkout:
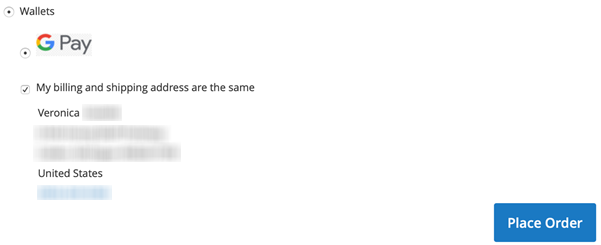
After the shopper clicks the Place Order button, the shopper sees their saved card details in their Google account. This assumes that shopper is already signed in to their Google account. If the shopper is not signed in to their Google account, Google asks them to.
If the shopper does not have a saved card in their Google account, they are asked to enter their card details.
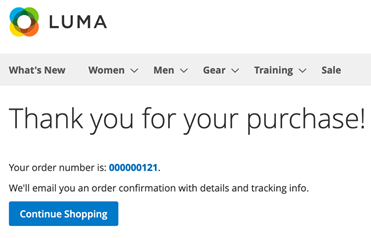
If the payment is approved by Google and Worldpay a success page appears:
Samsung Pay
Samsung Pay claims to be cutting edge technology with backward compatibility that makes acceptance easy for everyone. Apple Pay, Google Pay and Samsung Pay are all digital wallets that use Near-Field Communications (NFC). NFC makes secure data transmission from a mobile device to a point of sale (POS) system possible.
Pre-requisites
Shoppers must have a Samsung Pay enabled mobile device, even for PC payments
The Acquirer/Issuer must support tokenized transactions for In-App, as per card network specifications
The domain name and development IP address must be whitelisted from the Samsung server
Worldpay must enable Samsung Pay on your account
Requires server-to-server integration between Samsung and the partner's backend server
Features
Support for PC and mobile browser-based payments, using cards tokenized on mobile device user identification and device binding. This is based on the Samsung account ID (email ID)
User authentication and payment credential generation occurs in the shopper's device
Payment through PC Web
You can provide a Samsung pay option for payment on your web site. The shopper selects the Samsung Pay option to pay. The payment that requests the push message arrives in the shopper’s device and the payment is confirmed by user authentication. The generated payment cryptogram and data is passed to your system. Then it is passed to the PG (Payment Gateway) and card network side for transaction approval.
Integration preparation
For onboarding as a new partner of the Samsung Pay web checkout service, send the information in the bullet points below to the Samsung Pay team. The team will register the information on the admin portal. After this registration, you get your service ID from the Samsung Pay team. Use the service ID to integrate with the Samsung Pay web checkout APIs and web checkout UI.
Service Name: Give the payment gateway (PG) or merchant service name.
Domains: These verify the server-to-server API call. The Samsung web checkout API server uses this field to compare the domain or IP that calls the API. If they do not match, the transaction creation fails.
CSR: Give the CSR (Public) file to the Samsung Pay team. If you have separate files for both the development and production environment, give these two files together. The Samsung Pay team use the admin portal to register it. Payment credential data is encrypted using this CSR.
Development server IPs: Give your development server IPs. They are needed in the firewall exception list in the Samsung dev. environment. Once registered, the Web UI and web checkout API server in the Samsung development environment are opened for these IP addresses.
Production server IPs: Give your production server IPs. They are needed in the firewall exception list in the Samsung production environment for server-to-server connection. Once registered, the Web checkout API server is opened for these IP addresses.
Developer IPs: For testing, developers must manually call web checkout APIs. To support this, Samsung need the developers’ IP addresses from your side. These should be external IP addresses such as proxy server IP. Then Samsung team will also register them.
After doing this registration task, the Samsung team will give you your service ID for the web checkout service. This service ID is very important because it is used for the whole flow of web checkout service. The Samsung team will give you two service IDs, one is for development environment and the other one is for production environment.
Service ID: Unique identifier for identifying your system in Samsung web checkout service. It is used for the whole flow of the web checkout service. Read this guide for information and keep the Service ID for reference.
Samsung Pay architecture
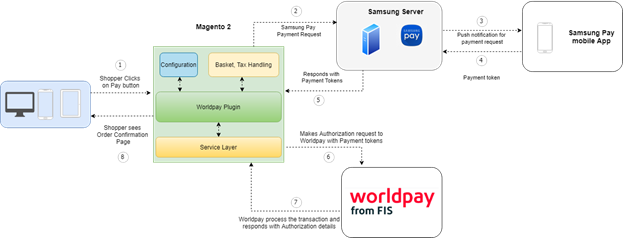
Here's what happens in above diagram:
Web checkout initiates the Samsung Pay wallet.
Samsung Pay returns the encrypted payload following shopper authentication.
The plugin sends the encrypted payload to your server.
The plugin sends an XML Direct request to Worldpay containing the encrypted Samsung Pay data.
Worldpay sends the Authorization response.
The plugin informs the shopper of the outcome (order success or failure).
Samsung Pay configuration
To configure Samsung Pay, do the following:
Go to Admin/Stores/Configuration/Sales/Worldpay/Mobile Wallets.
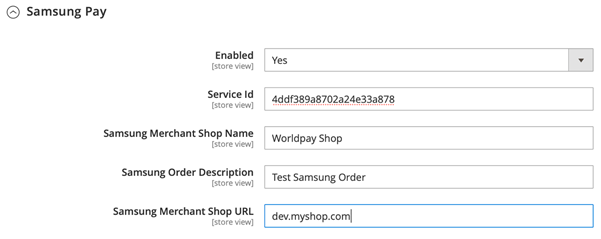
The Samsung Pay configuration is in the Mobile Wallets section. Complete and save these configuration settings, as shown below. When you have finished, shoppers can use Samsung Pay at the checkout.
| Configuration | Description |
|---|---|
| Enabled | When set to Yes, Samsung Pay is available at the checkout. |
| Service ID | A unique identifier for identifying your system in Samsung web checkout service. See the bullet points above. |
| Samsung Merchant Shop Name | Your store name that appears on the store view. |
| Samsung Order Description | The generic order description. |
| Samsung Merchant Shop URL | Your online store URL. |
Test/Live mode
You can change the environment in General Configuration section. See the screenshot below:
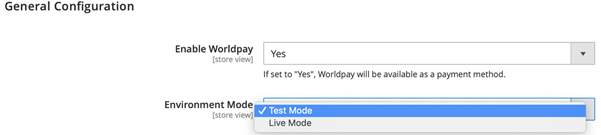
You do not need to change the API URL, it is automatically changed based on the selection above.
Shopper journey
Here is a typical shopper journey with a successful payment:
Once Samsung Pay is enabled, shoppers see it as an option on the Magento checkout page:
Once authentication is successful, the shopper is redirected to Samsung Pay page and submits their ID (an email address).
After submitting Samsung account ID, Samsung checks for the registered device under that account ID and triggers a push notification to that device. The User has to accept/reject the payment in 5 minutes before this expires.
A push notification is sent to the Samsung phone.

The shopper must authorize the device the he or she uses for payment.
If necessary, add a card to make the payment. If a card is already available use the Samsung Pay PIN to continue.
The payment is accepted (or rejected).
Assuming the payment is verified, the shopper is redirected to your shop page with a success message.
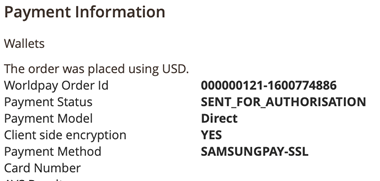
You, the merchant, can see the Samsung Pay order in the Magento admin, under the Sales/order section.
If for any reason the payment is not made, the shopper is redirected to the shop cart page URL and the order is cancelled. The same shopping cart is restored. Payments can fail for a variety of reasons. These include authentication failure, the shopper clicks the Cancel Order button, or the Return to Store button on the Samsung payment page.
Samsung Pay links
Chrome Pay
To speed up the checkout process, Chrome Pay collects saved data from the Google Chrome browser and displays that data within checkout forms.
Shoppers see a single pop-up window that they use to confirm or change their details (billing and shipping address, and their choice of saved credit cards).
Chrome Pay configuration
To configure Chrome Pay, do the following:
Go to Store/Configuration/Sales/Worldpay/Google Chrome Payment Request API.
Complete and save the configuration settings, as shown in the table below. When you have finished, shoppers can use Chrome Pay.
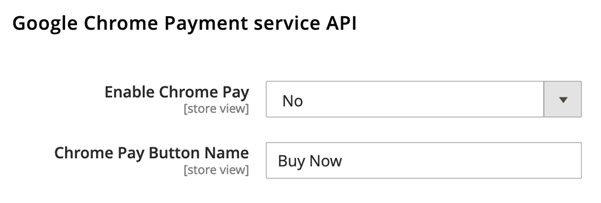
| Configuration | Description |
|---|---|
| Enable Chrome Pay | If set to Yes, Chrome Pay is available in the shopper’s cart. |
| Chrome Pay Button Name | Edit the button label to access Chrome Pay. |
The Chrome Payment Request API only works if the integration mode is set to Direct at Store/Configuration/Sales/Worldpay/Credit Cards.
Shopper journey
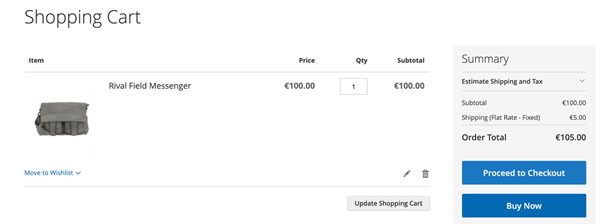
When Chrome Pay is enabled, shoppers see a Buy Now button in their cart, as shown below:
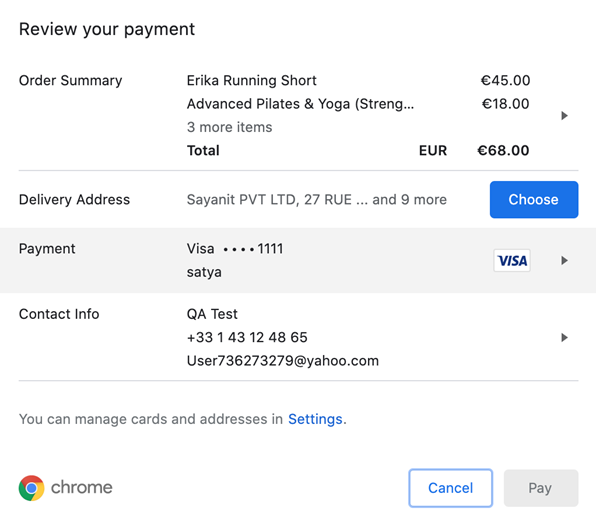
When the shopper clicks Buy Now, the Chrome payment request API displays the pop-up shown below:
The shopper selects their delivery address:
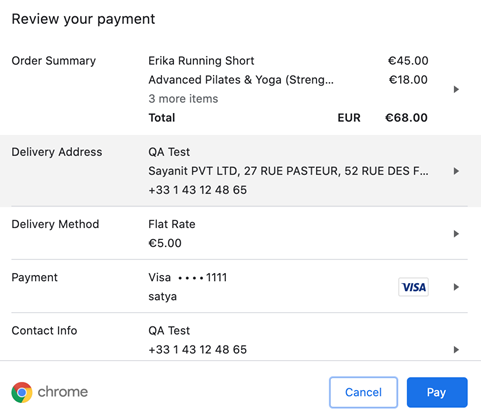
Then they review their order:
Finally, the shopper enters their CVC from the back of the payment card:
Chrome Pay 3DS-2
The Chrome Payment services API supports strong customer authentication. To enable 3DS2, see 3DS Configuration.
Intelligent Account Verification (IAV) is a feature to validate a credit card.
Cardholders submit a zero or nominal value (a payment with a value greater than zero) while Worldpay determine the amount with the best chance of approval. Any value above zero is automatically reversed.
The processing of a nominal value (or zero) is an important part of verifying that an account is real and set up for transactions. Contact Worldpay Support to enable IAV for your company or organization.
How to configure Intelligent Account Verification (IAV)
Follow the steps below:
- Go to Admin > Configuration->Sales->Worldpay->Credit Cards->Enable Intelligent Account Verification. The screen should appear similar to the screenshot below.

The shopper can save a new card through Intelligent Account Verification or through zero-authorization. All form validations are handled through Custom labels and Custom Alert messages.
To configure alerts/show customized messages, do the following:
Go to Store/Settings/Configuration/Sales/Worldpay Exception Codes.
The default alert messages are under Customize Account Level Messages. You can customize these messages and the custom message box.

Click Save Config after updating the configurations.
Use the information in the table below to add the configurations above.
| Message code | Actual message | Custom message |
|---|---|---|
| IAVMA1 | Please verify the Billing Address in your Address Book before adding new card! | |
| IAVMA2 | Are you sure you want to delete the card? Once the card is deleted, subscriptions associated with it will be cancelled!!! | |
| IAVMA3 | The card has been added | |
| IAVMA4 | Your card could not be saved |
Manage/Customize labels
To manage/customize labels do the following:
Go to Store/Settings/Configuration/Sales/Worldpay Custom Labels.
The default labels are under My Account Labels, you can customize these labels as well as the custom message box.
Click Save Config after updating the configurations.
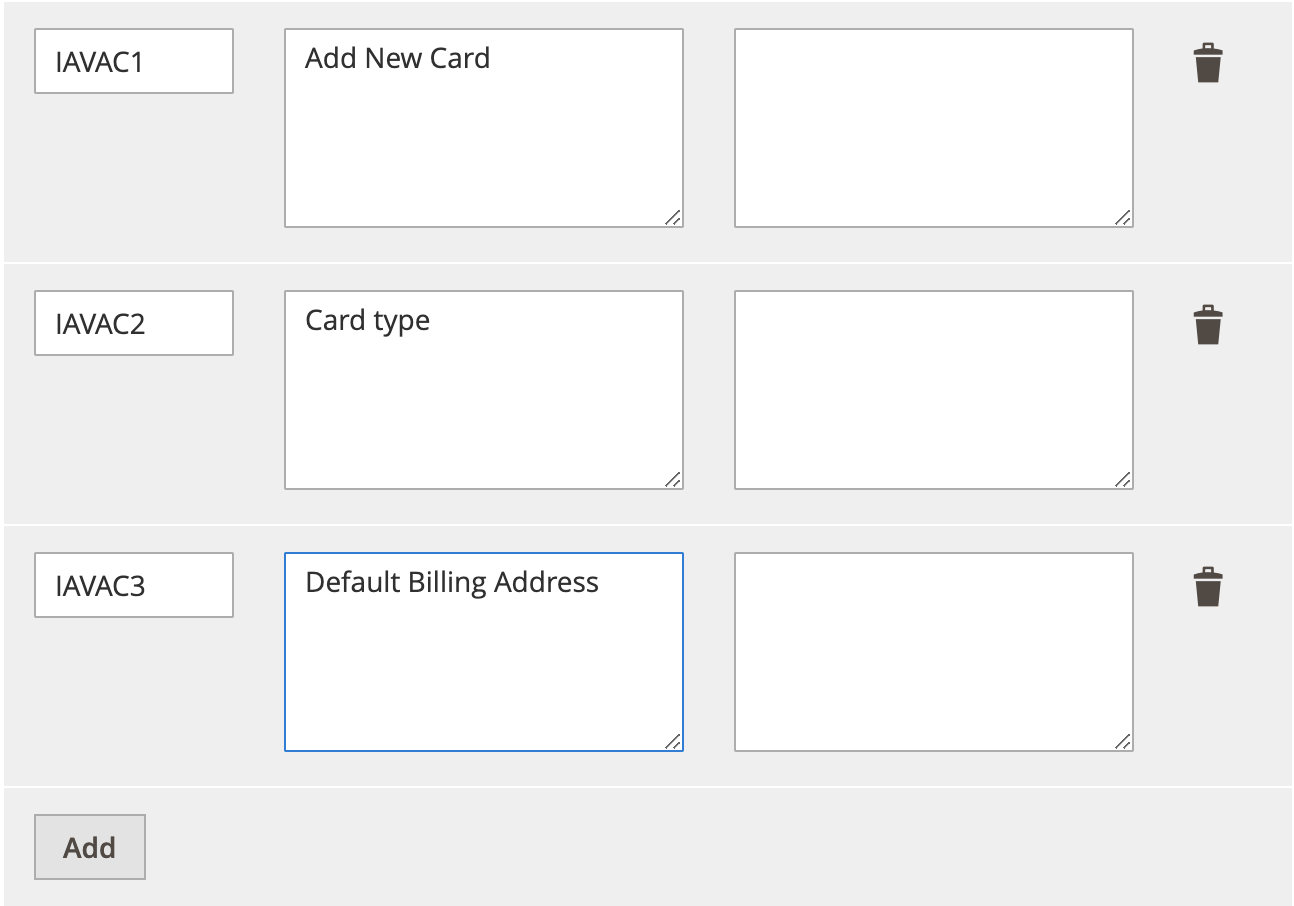
Use the information in the table below to add or update the above configurations.
| Message Code | Actual Message | Custom Message | | IAVAC1 | Add New Card | | | IAVAC2 | Card type | | | IAVAC3 | Default Billing Address | |
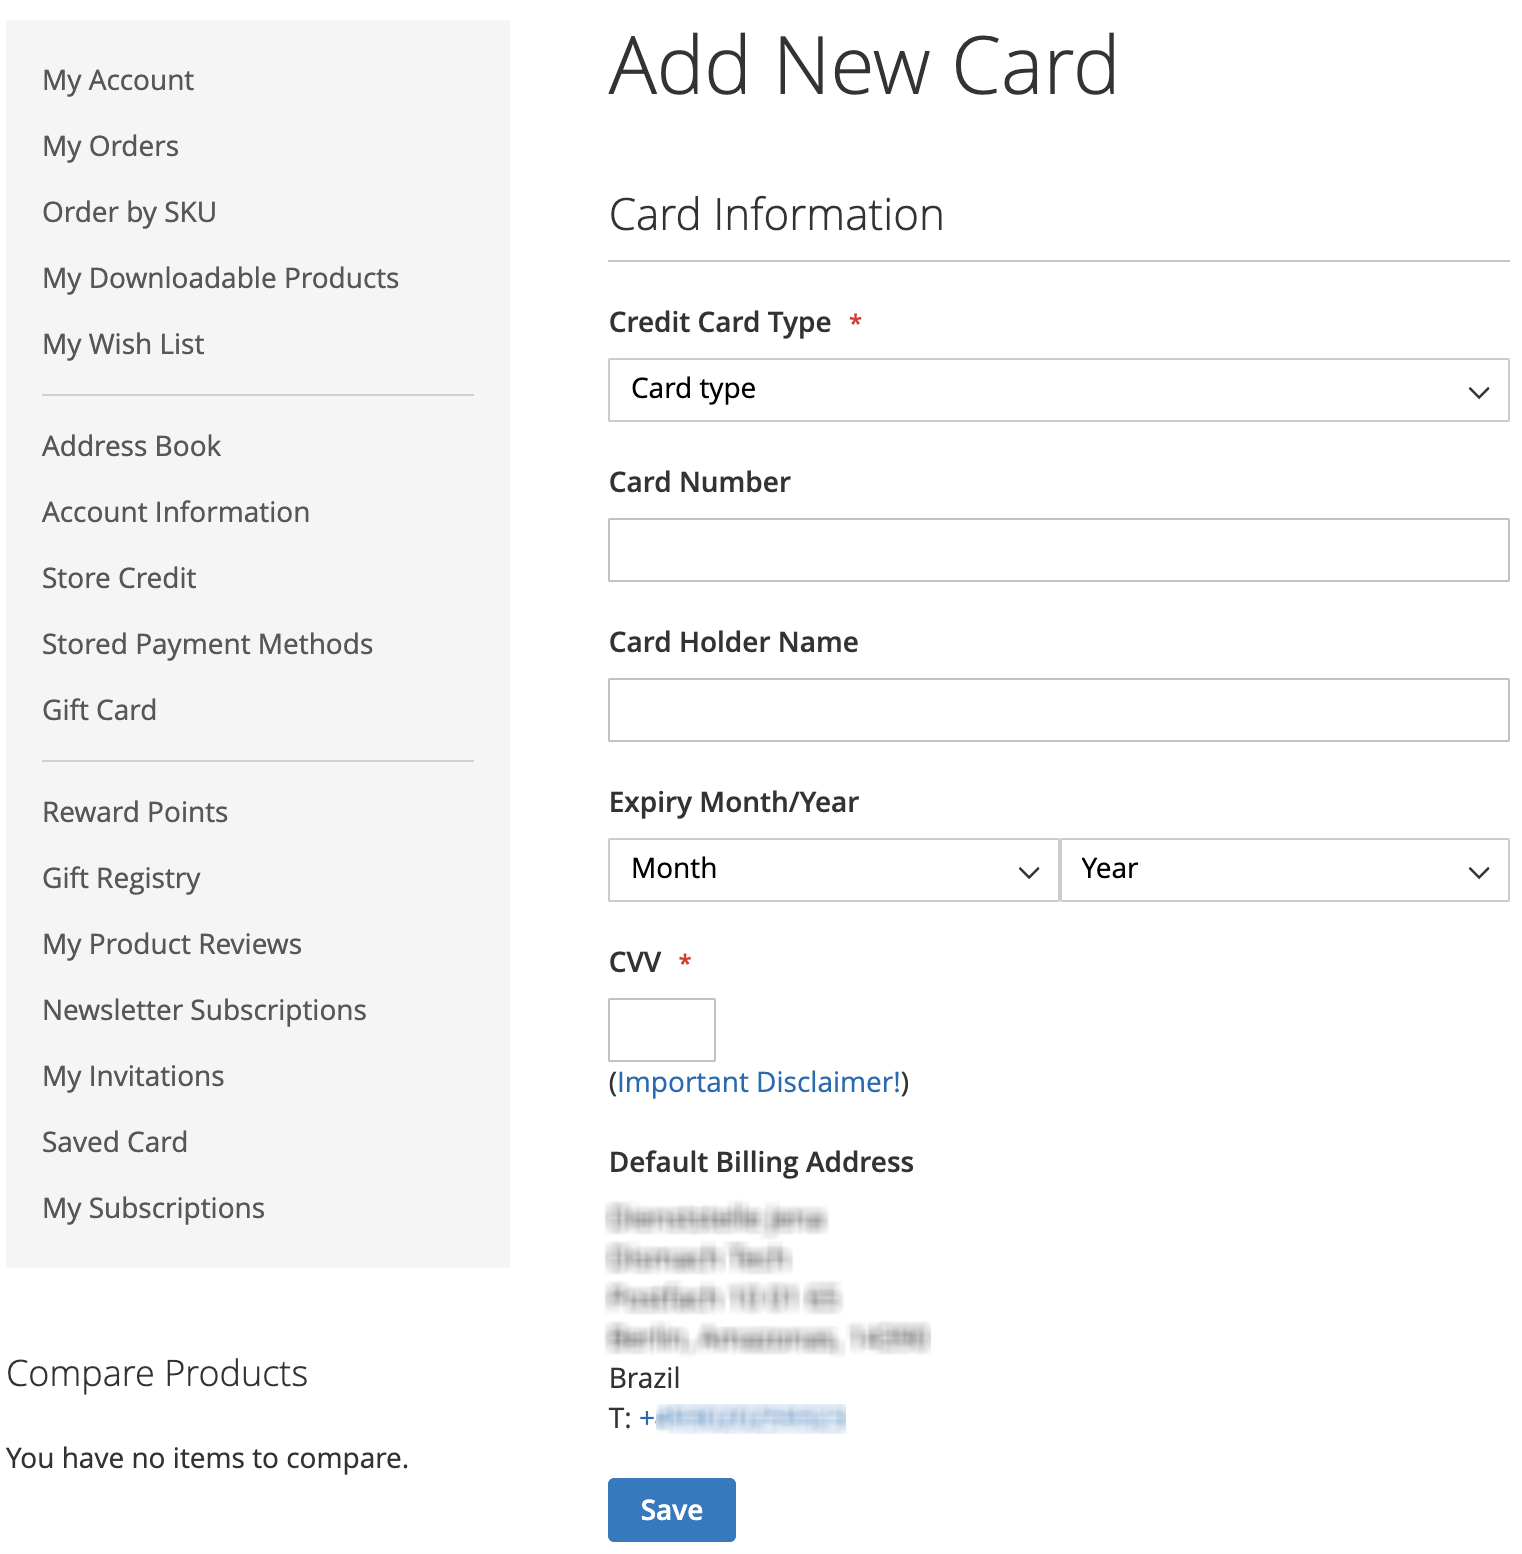
Shopper experience
A new form is added for saving new credit cards under Login->My Account->Saved cards->Add new card. See the screenshot below.
Key XML update
Worldpay IAV with zero authorisation amount for saving new card.
<paymentDetails action="ACCOUNTVERIFICATION"> <amount currencyCode="EUR" exponent="2" value="0"/>
The card is saved if ((lastEvent == 'AUTHORISED') || ((lastEvent == 'CANCELLED') && (riskScore[value] < 100 || riskScore[finalScore]< 100)) ) else, card is not saved in shoppers account.
IAV works with AVS, CVC, 3DS, and checks made by a Worldpay fraud detection service, where available.