Last Updated: 14 June 2025 | Change Log
You can customize your payment page by:
- selecting the relevant channel from the "Channel" dropdown in the top navigation
- adjusting properties for payment methods and payment page
- personalize your merchant settings
- preview your changes
Channels are a set of customizations that you can use to customize different payment pages with specific requirements. We provide a "Default" channel for your payment page but you can also create new channels to customize the payment page for different business verticals and events.
You can create a new channel to apply a required set of customizations to the payment page.
When logging into the Payment Page Designer for the first time, you will see the 'Default' channel in the 'Channel' dropdown menu. To add a new channel:
Start writing the name of the new channel in the 'Channel' dropdown textbox

Click 'Add' to create the new channel
Click 'Add' in the pop-up window below to confirm your action

To utilize the customization you have configured for the created channel, simply choose the desired channel from the 'Channel' dropdown menu. The customization ID is displayed next to the dropdown.

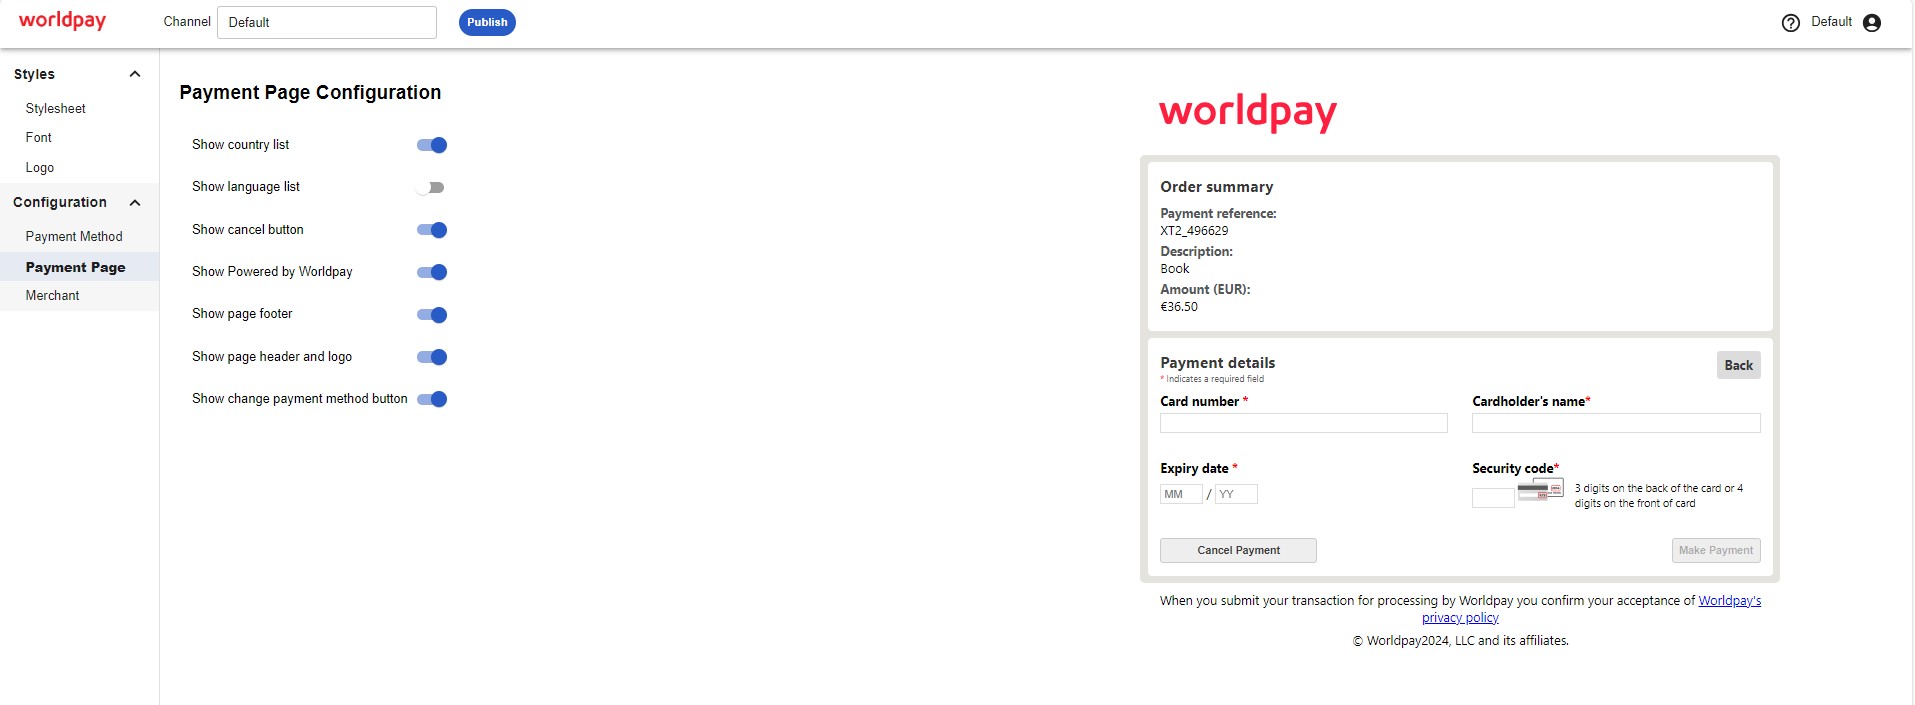
To make changes to your payment page, expand the Configuration menu where you will find three options to choose from:
- Payment Method
- Payment Page
- Merchant
Opening these sections reveals the following properties:
| UI element | Description | Default |
|---|---|---|
Show card icons | If toggle is on, logos for card payments are displayed.You may want to hide the card icons if you are displaying the payment pages in an iframe and you already provide the card types in your own website. | Toggle off (false) |
Show cardholder name | If toggle is on, the cardholder name is displayed above their payment details.You may want to hide this if the customer's name is already displayed elsewhere on your payment page. Info If set to false, you must provide the cardholder name in the billing address, and it must contain at least one of <firstName> or <lastName>. | Toggle on (true) |
Show payment details header | If toggle is on, the payment header is displayed.You may want to hide this to reduce the frame size or to complement your aesthetic. | Toggle on (true) |
Mask card details | If toggle is on, the card and CVC number are hidden as they are typed. | Toggle off (false) |
Shipping Address | Displays the shipping address of the customer on the payment pages. The dropdown has the following options :
| Hide |
Billing Address | Displays the billing address of the customer on the payment pages. Dropdown have following options :
| Edit |
Contact Details | Displays the contact details of the customer on the payment pages. Dropdown have following options :
| Hide |
Change Payment Button Text | Customize the text displayed on the Make Payment button with a variety of alternatives available through a drop-down menu:
| Make payment |
| Wallet | UI element | Description | Default |
|---|---|---|---|
| Google Pay | |||
Button Colour | Change the color displayed on the Google Pay button through a drop-down menu:
| Black | |
Button Label | Change the text displayed on the Google Pay button through a drop-down menu:
| Buy with G Pay | |
| Apple Pay | |||
Button Colour | Change the color displayed on the Apple Pay button through a drop-down menu:
| Black | |
Button Label | Change the text displayed on the Apple Pay button through a drop-down menu:
| Apple Pay |

| UI element | Description | Default |
|---|---|---|
Show country list | If toggle is on, displays a drop-down list of countries on the payment pages. | Toggle off (false) |
Show language list | If toggle is on, displays a drop-down list of languages on the payment pages. | Toggle off (false |
Show cancel button | If toggle is on, the cancel button lets the customer cancel the payment. | Toggle on (true) |
Show Powered by Worldpay | The "Powered by Worldpay" logo (referring to "worldpay" on the payment pages) is displayed while content is being displayed on a payment page. | Toggle on (true)) |
Show page footer | If toggle is on, Worldpay copyright information is displayed in the footer. | Toggle on (true) |
Show page header and logo | If toggle is on, we display the selected logo and associated space around the logo. | Toggle on (true) |
Show change payment method button | Returns the customer to the payment method selection page. | Toggle on (true) The Change payment method button is displayed.Info A back button may be displayed instead of a change payment method button. |
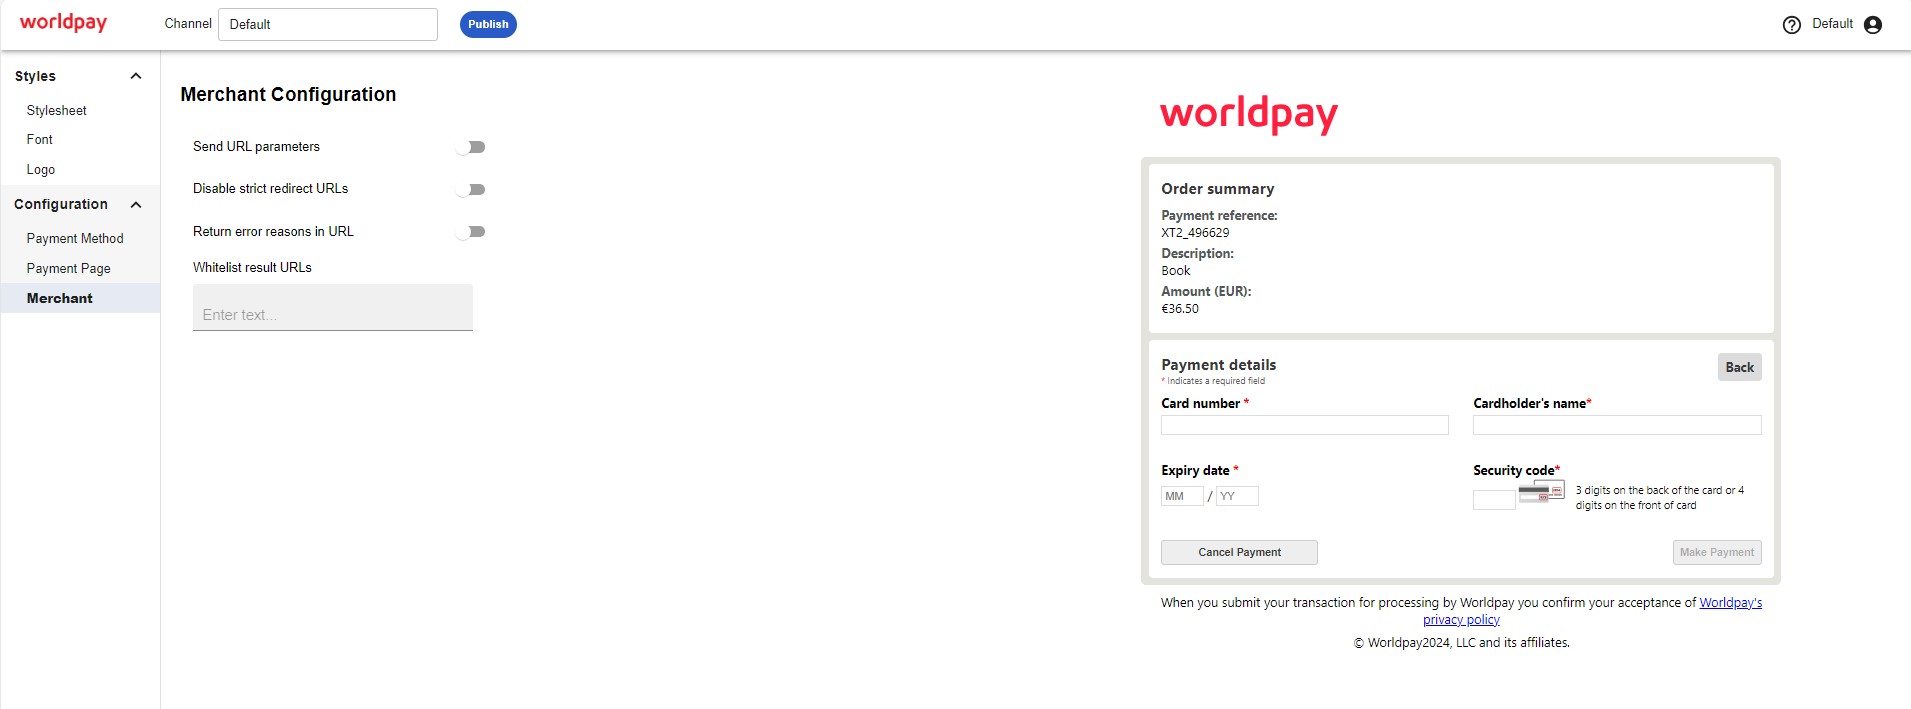
Customize settings about the parameters that you send and receive from us.
During the payment process, you can optionally append parameters to one or both of the following URLs:
Redirect URL:
Once we receive your initial order, we send a response containing a redirect URL. You use this to redirect your customer to the payment pages. You can optionally append our standard parameters or your own custom parameters to the redirect URL.Result URL:
When we receive the payment result, we redirect your customer to a result page. We recommend that you provide us with your custom result URLs.
| Field | Type of redirect | Description | Gateway default |
|---|---|---|---|
| Disable strict redirect URLs | result URL | When we return the customer to your website with the payment result URL, we may append additional parameters to the query-string. When we construct the URL, we append the fragment after query string:
| Toggle on (true) |
| Return error reasons in URL | result URL | When this feature is enabled, and there's a problem processing a payment on the payment pages, we can return additional information on the query-string of your result URL:
| Toggle on (true) |
| Whitelist redirect URLs | result URL | This allows you to whitelist redirect URLs. You can use this to redirect your customer to a sites that don't necessarily start with "http/https". | No default. Whitelist one or more URL(s). |
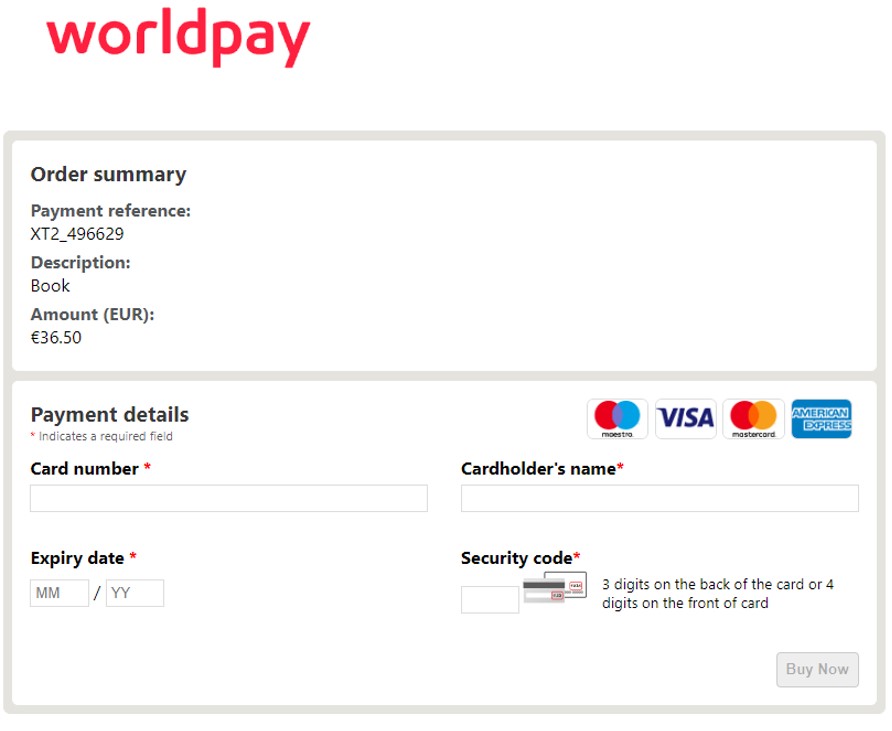
The preview window on the right-hand side allows you to see how your customization appear on the page.
Only the card capture page is visible. The preview doesn't currently reflect all account configurations and payment page properties. You can use it as a visual guide to see how your logo and stylesheet (CSS) have been rendered on the page.
We strongly recommend you complete sufficient testing in TRY before publishing to production. For more information see test and publish