Last updated: 31 July 2025 | Change log
Use the WooCommerce plugin to easily integrate your online store into Worldpay eCommerce.
You must have a Worldpay eCommerce account with us and access to the Dashboard Portal.
Go and watch our video tutorial on how to install the WooCommerce plugin!
Woocommerce version required at least: 8.4.0
Woocommerce version tested up to: 8.5.1
Wordpress required at least: 6.4.2
PHP version required at least: 7.4
- Install the WooCommerce plugin.
- Log in with your WooCommerce credentials.
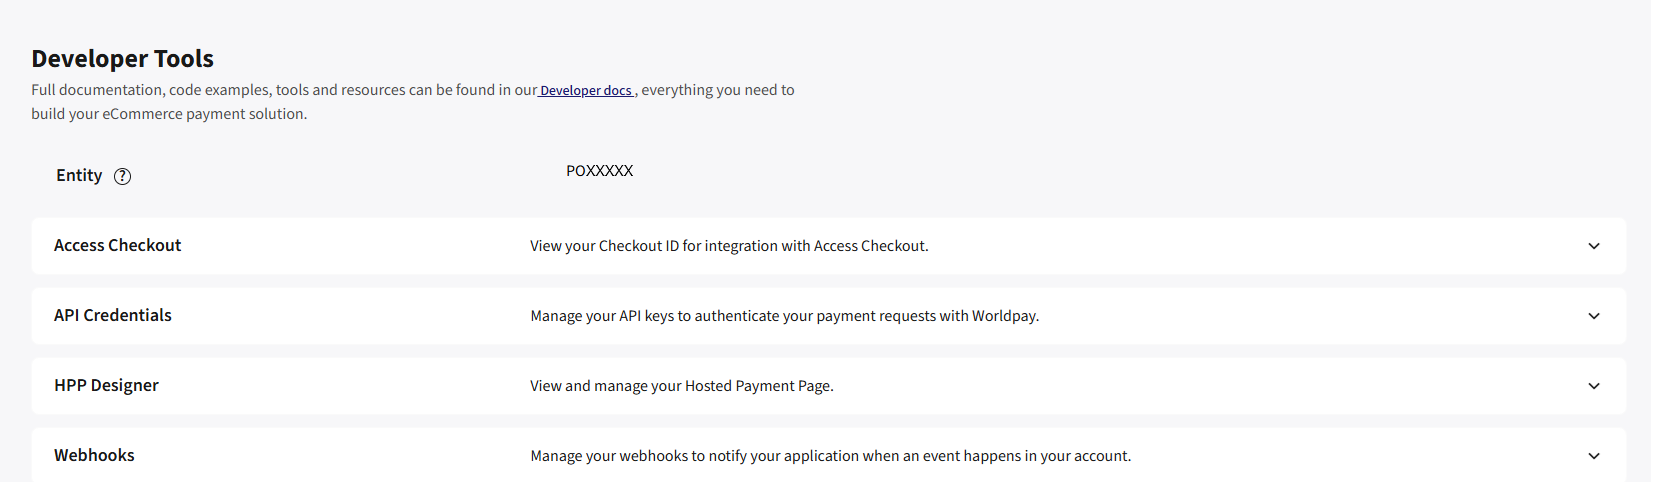
- Log into your dashboard.
- Click on "Developer Tools".
- Click on "API Credentials".
- Choose "Try mode" and retrieve your credentials. You need:
- your Try API username
- your Try API password
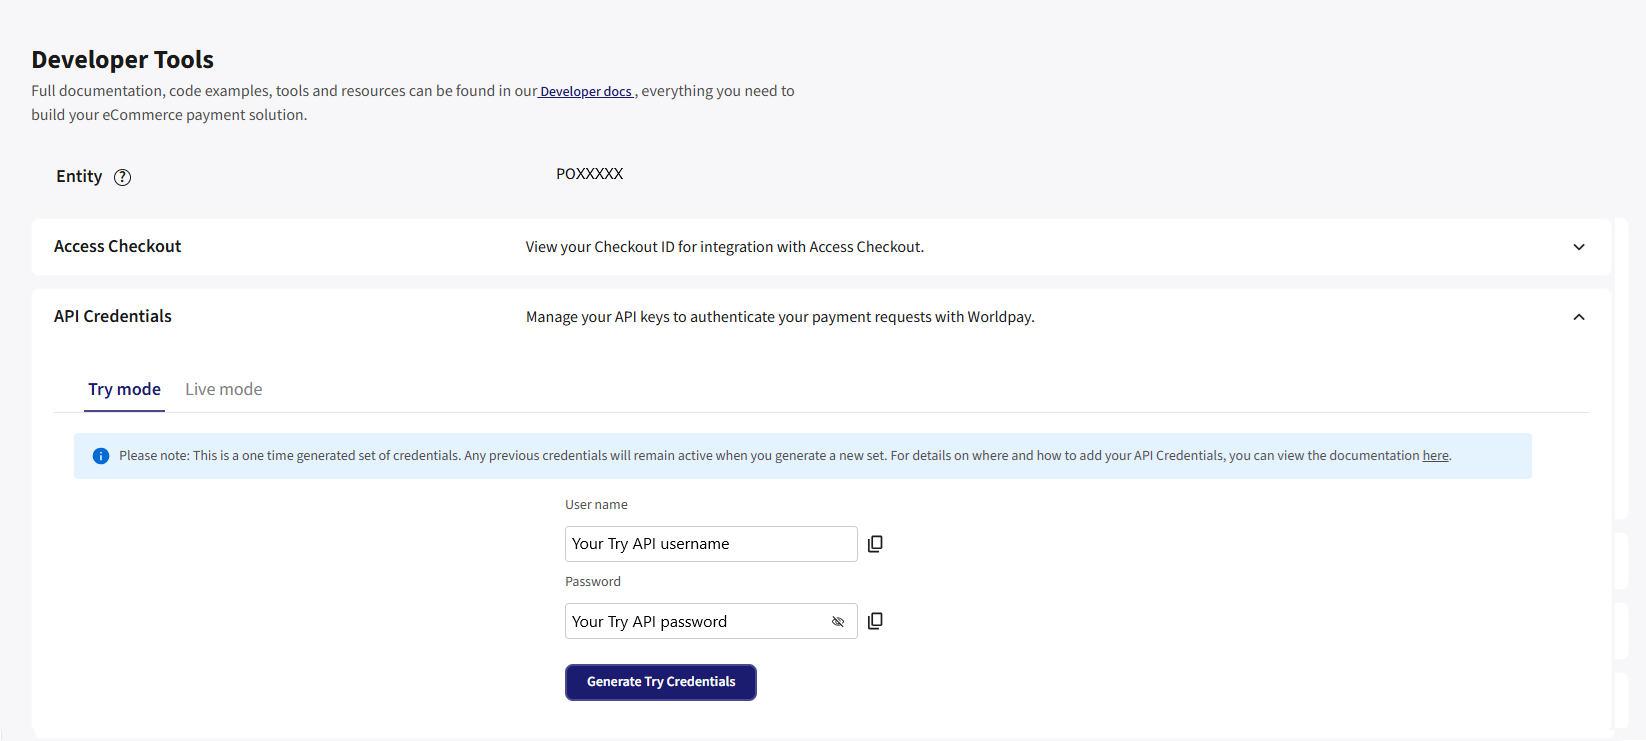
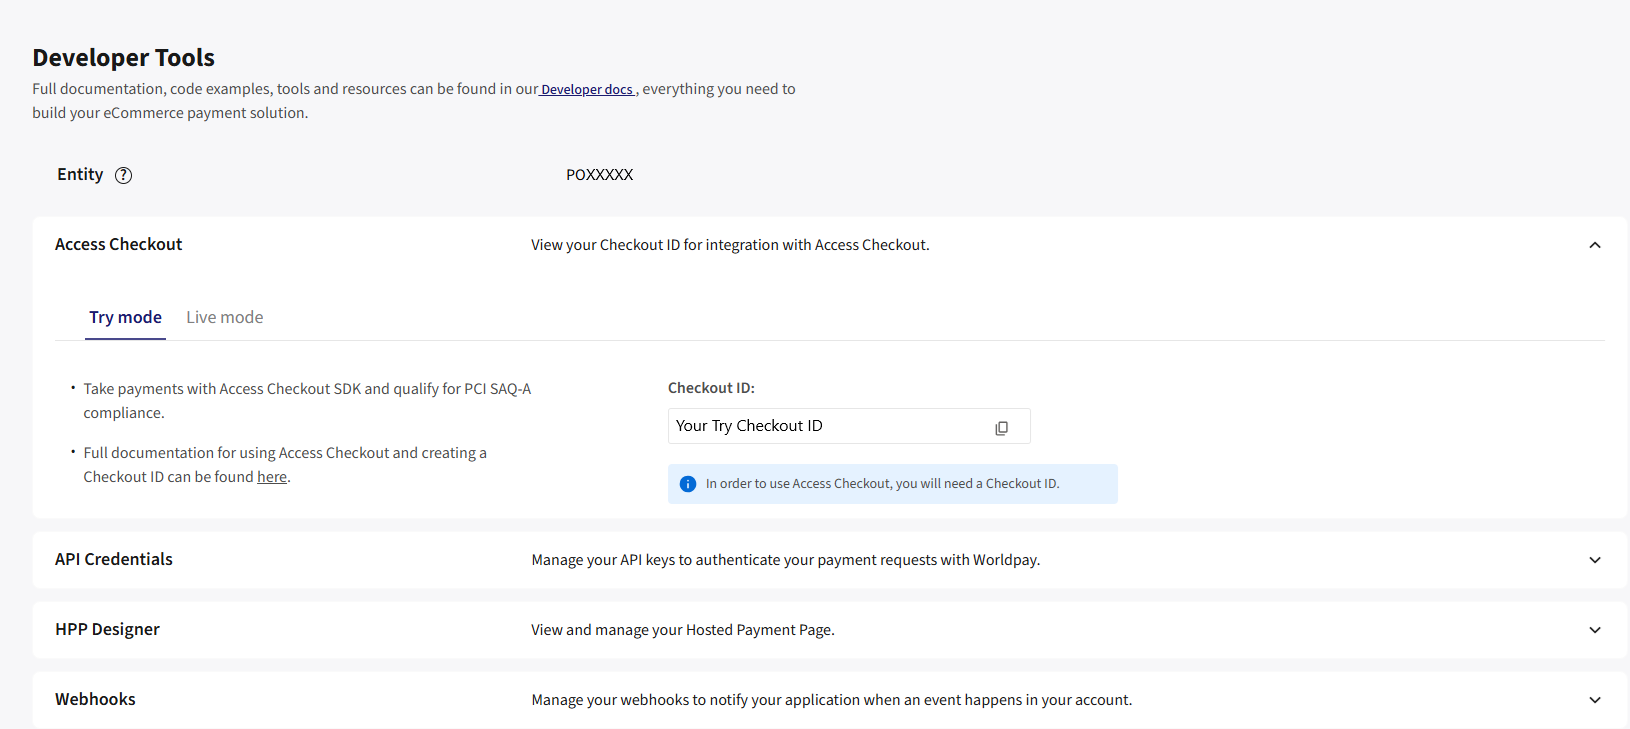
- If you want to you use the embedded checkout, click on "Access Checkout". You also need:
- your Try Checkout ID
- Log into your dashboard.
- Click on "Developer Tools".
- You can find your
entitynext to "Entity" usually prefixed with "PO".
In your WordPress Admin Dashboard, go to "Plugins" then click "Add New" then click "Upload Plugin"
Click "Install"
Once installed click "Activate"
Go to the "Payments" tab and tick the box to "Enable Worldpay"
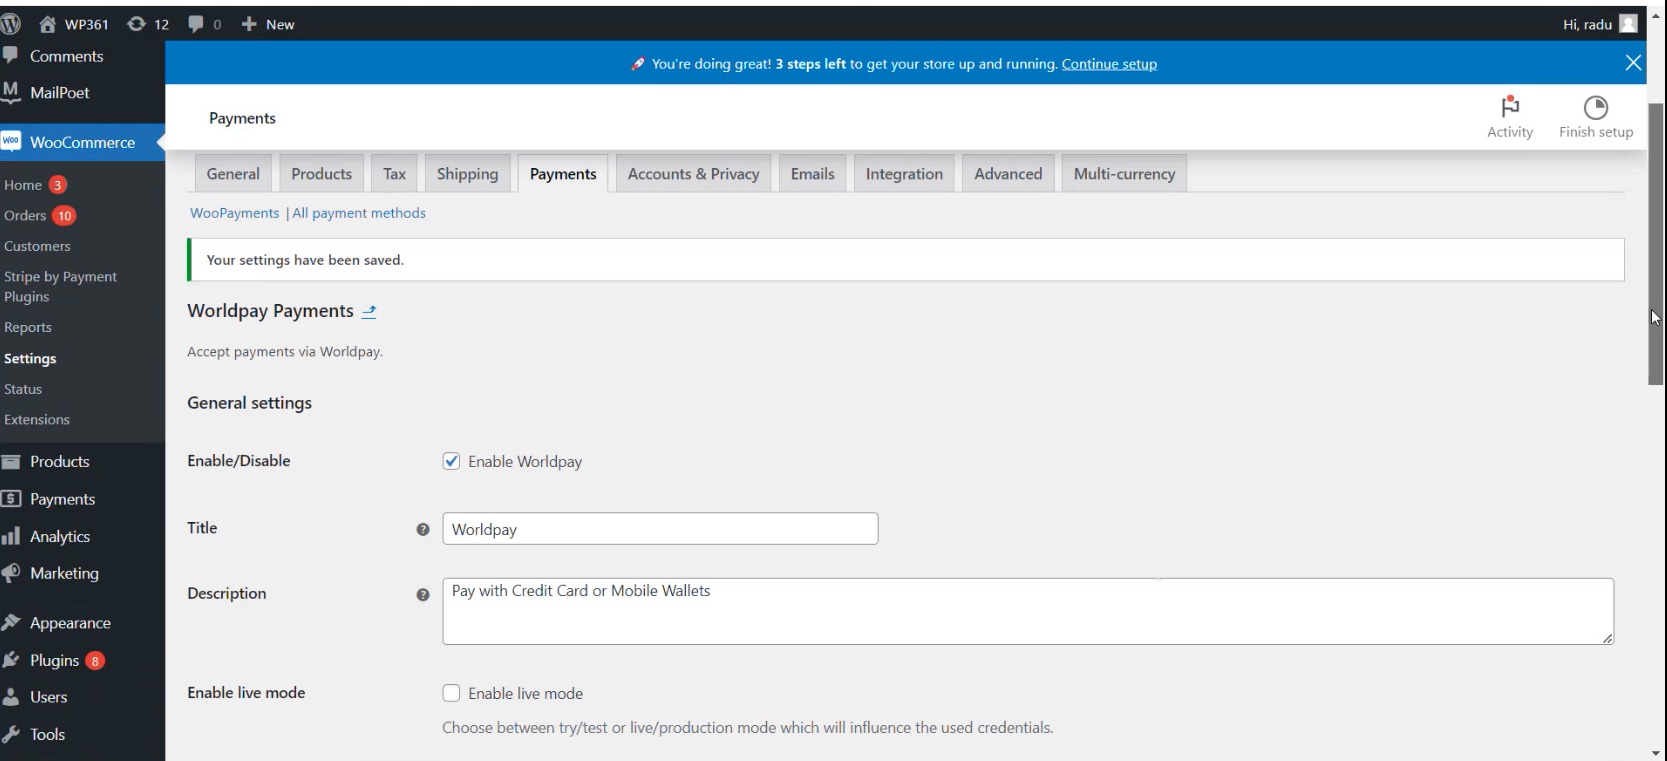
Scroll down and enter your Worldpay Try username and password in the "Try API Credentials" section
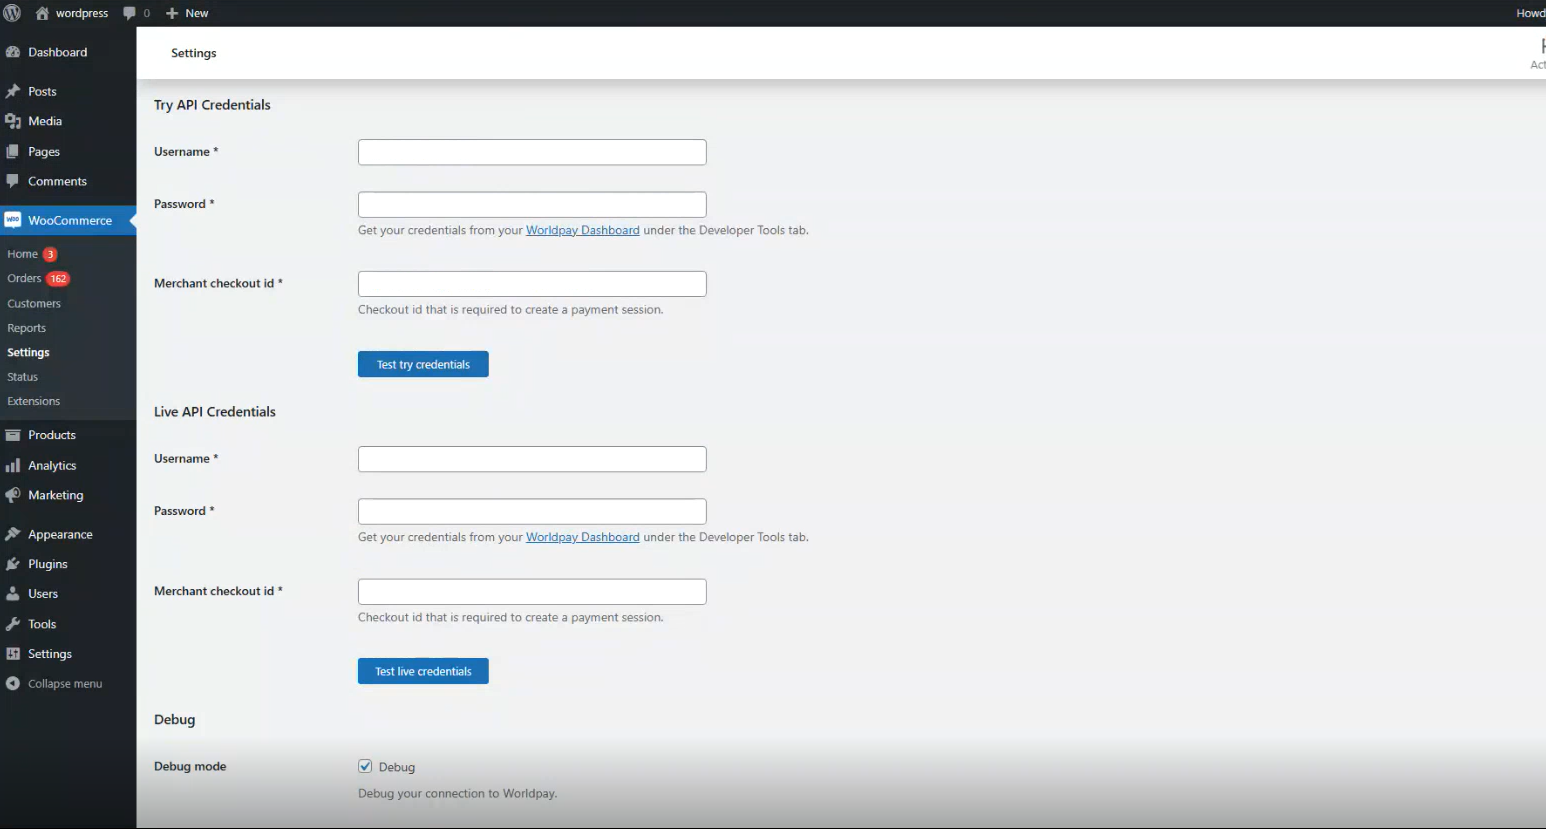
"Save changes"
Once you have configured your WooCommerce Worldpay Plugin, you can take test transactions using our test card numbers.
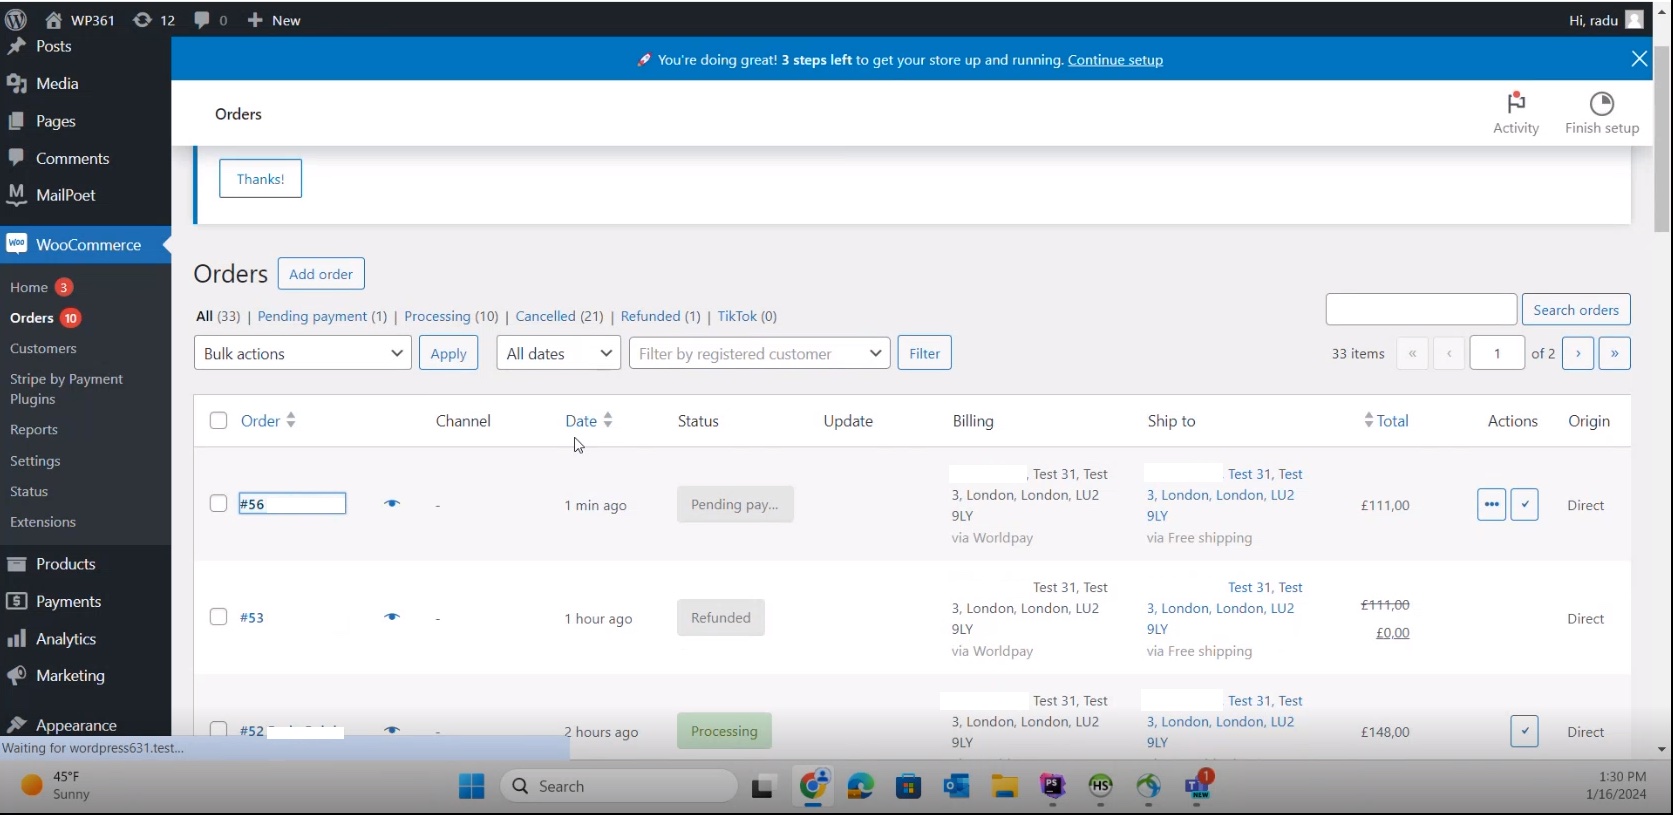
To view your test transactions, log into your WordPress Admin Dashboard. Click on "Orders" where the test transactions appear.
These are the steps you need to follow to go live:
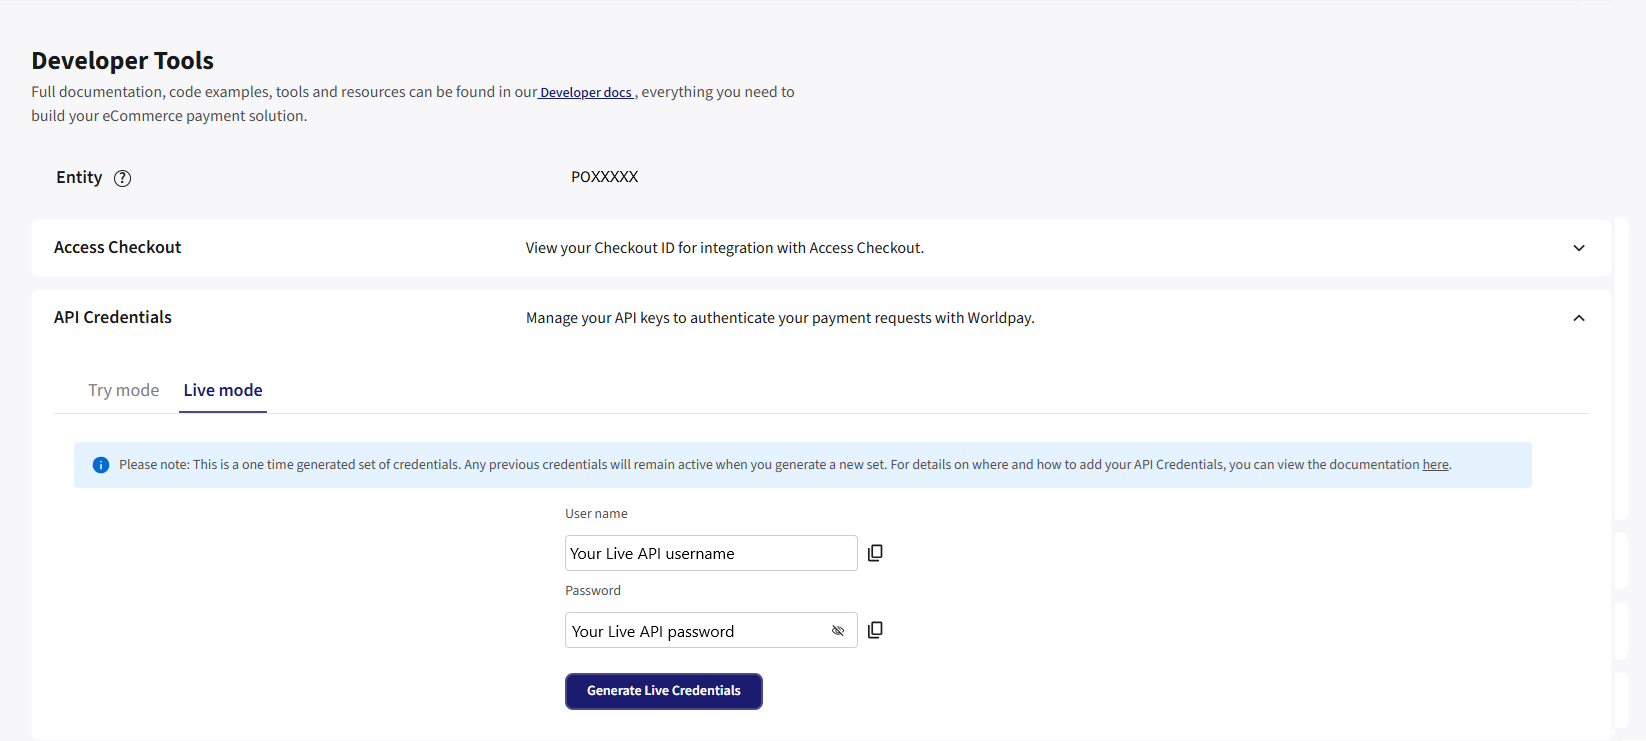
- Log into your dashboard.
- Click on "Developer Tools".
- Click on "API Credentials".
- Choose "Live mode" and retrieve your credentials. You need:
- your Live API username
- your Live API password
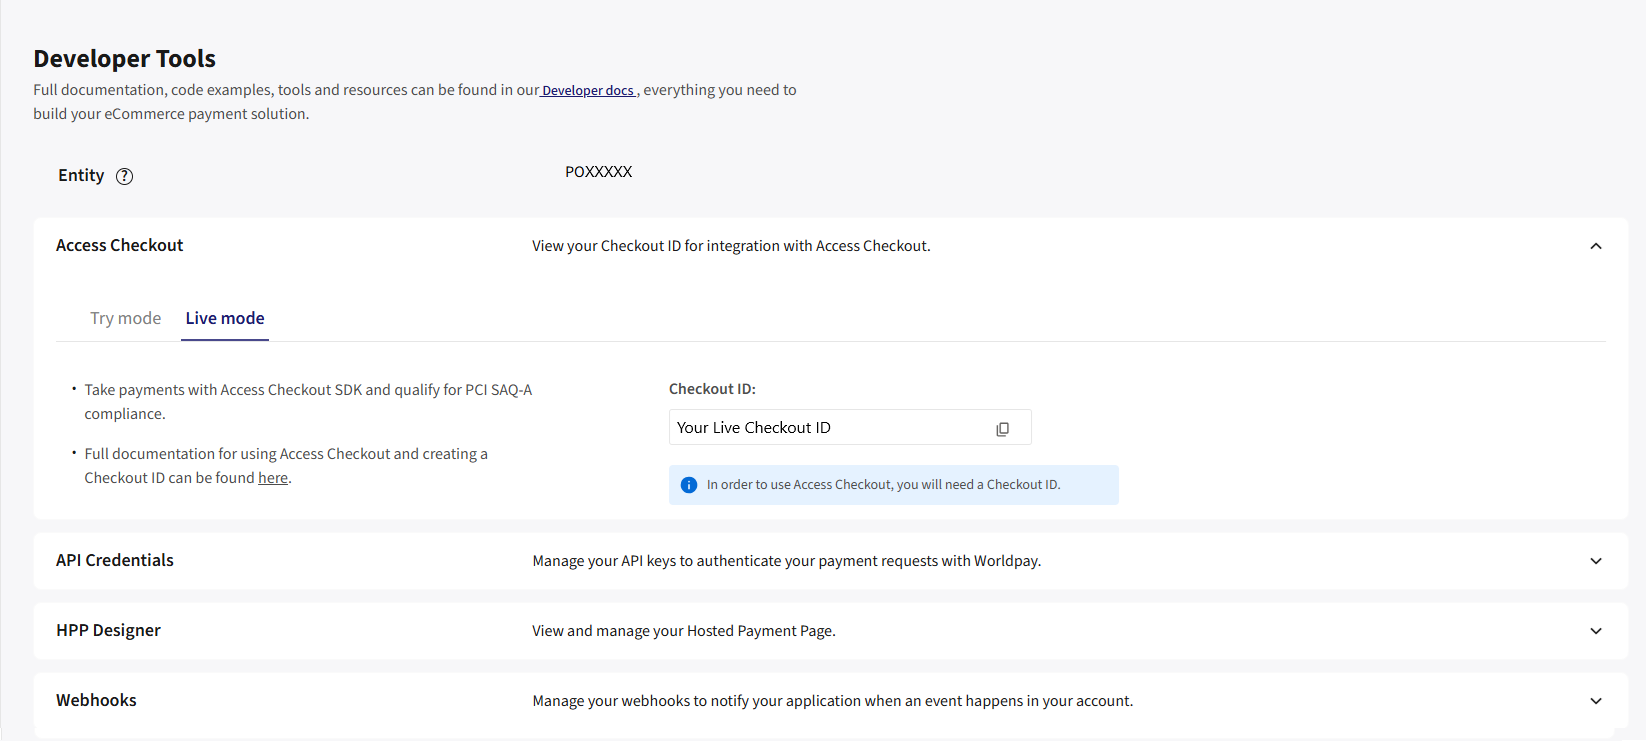
- If you are using embedded checkout, click on "Access Checkout" and get:
- your Live Checkout ID
Your Live credentials and Checkout ID are different to any other Worldpay credentials you already have. The entity used for production transactions is the same for Try and Live.
- Navigate to the WooCommerce "Payments" screen in your WordPress Admin Dashboard.
- Tick the "Enable live mode" box.
- Copy and paste the credentials from your dashboard to the config screen. This time making sure they are going into the "Live API Credentials" section.
- Ensure the "debug" toggle is off.
- You can now initiate a live transaction.
For any other issues or further support log into dashboard and visit our support centre.