US and Canadian domestic acquiring
The features in this section only apply to merchants in the US and Canada.
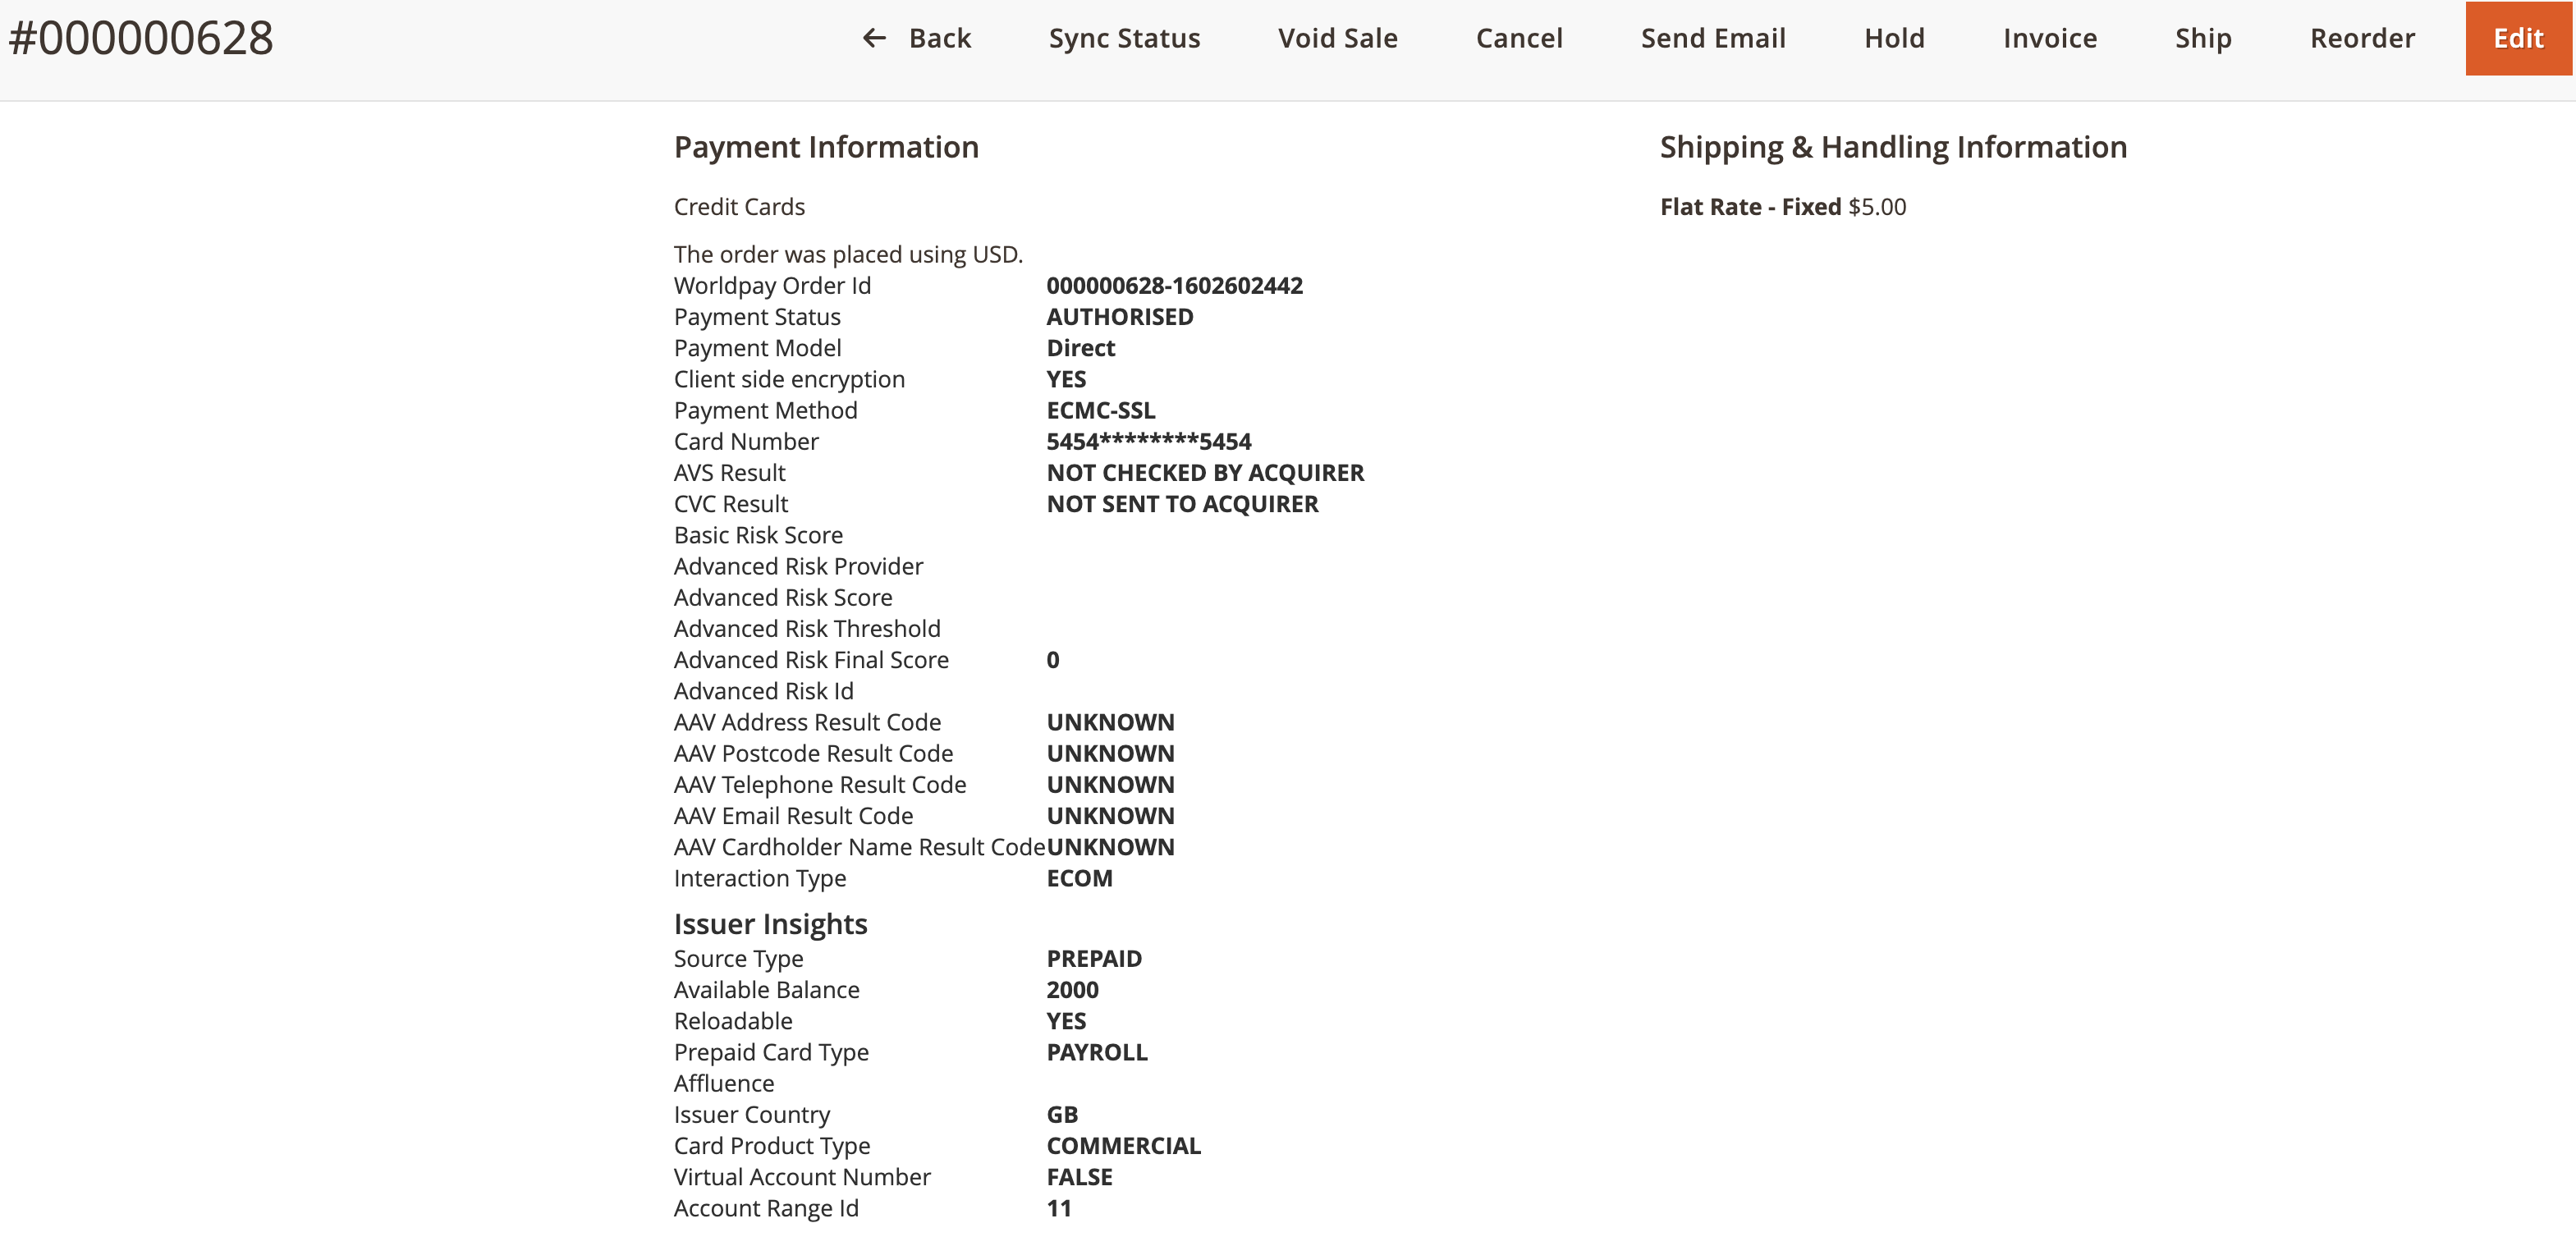
Issuer Insights
This section describes the additional data available once Issuer Insights is enabled by WorldPay.
To view Issuer Insights, do the following:
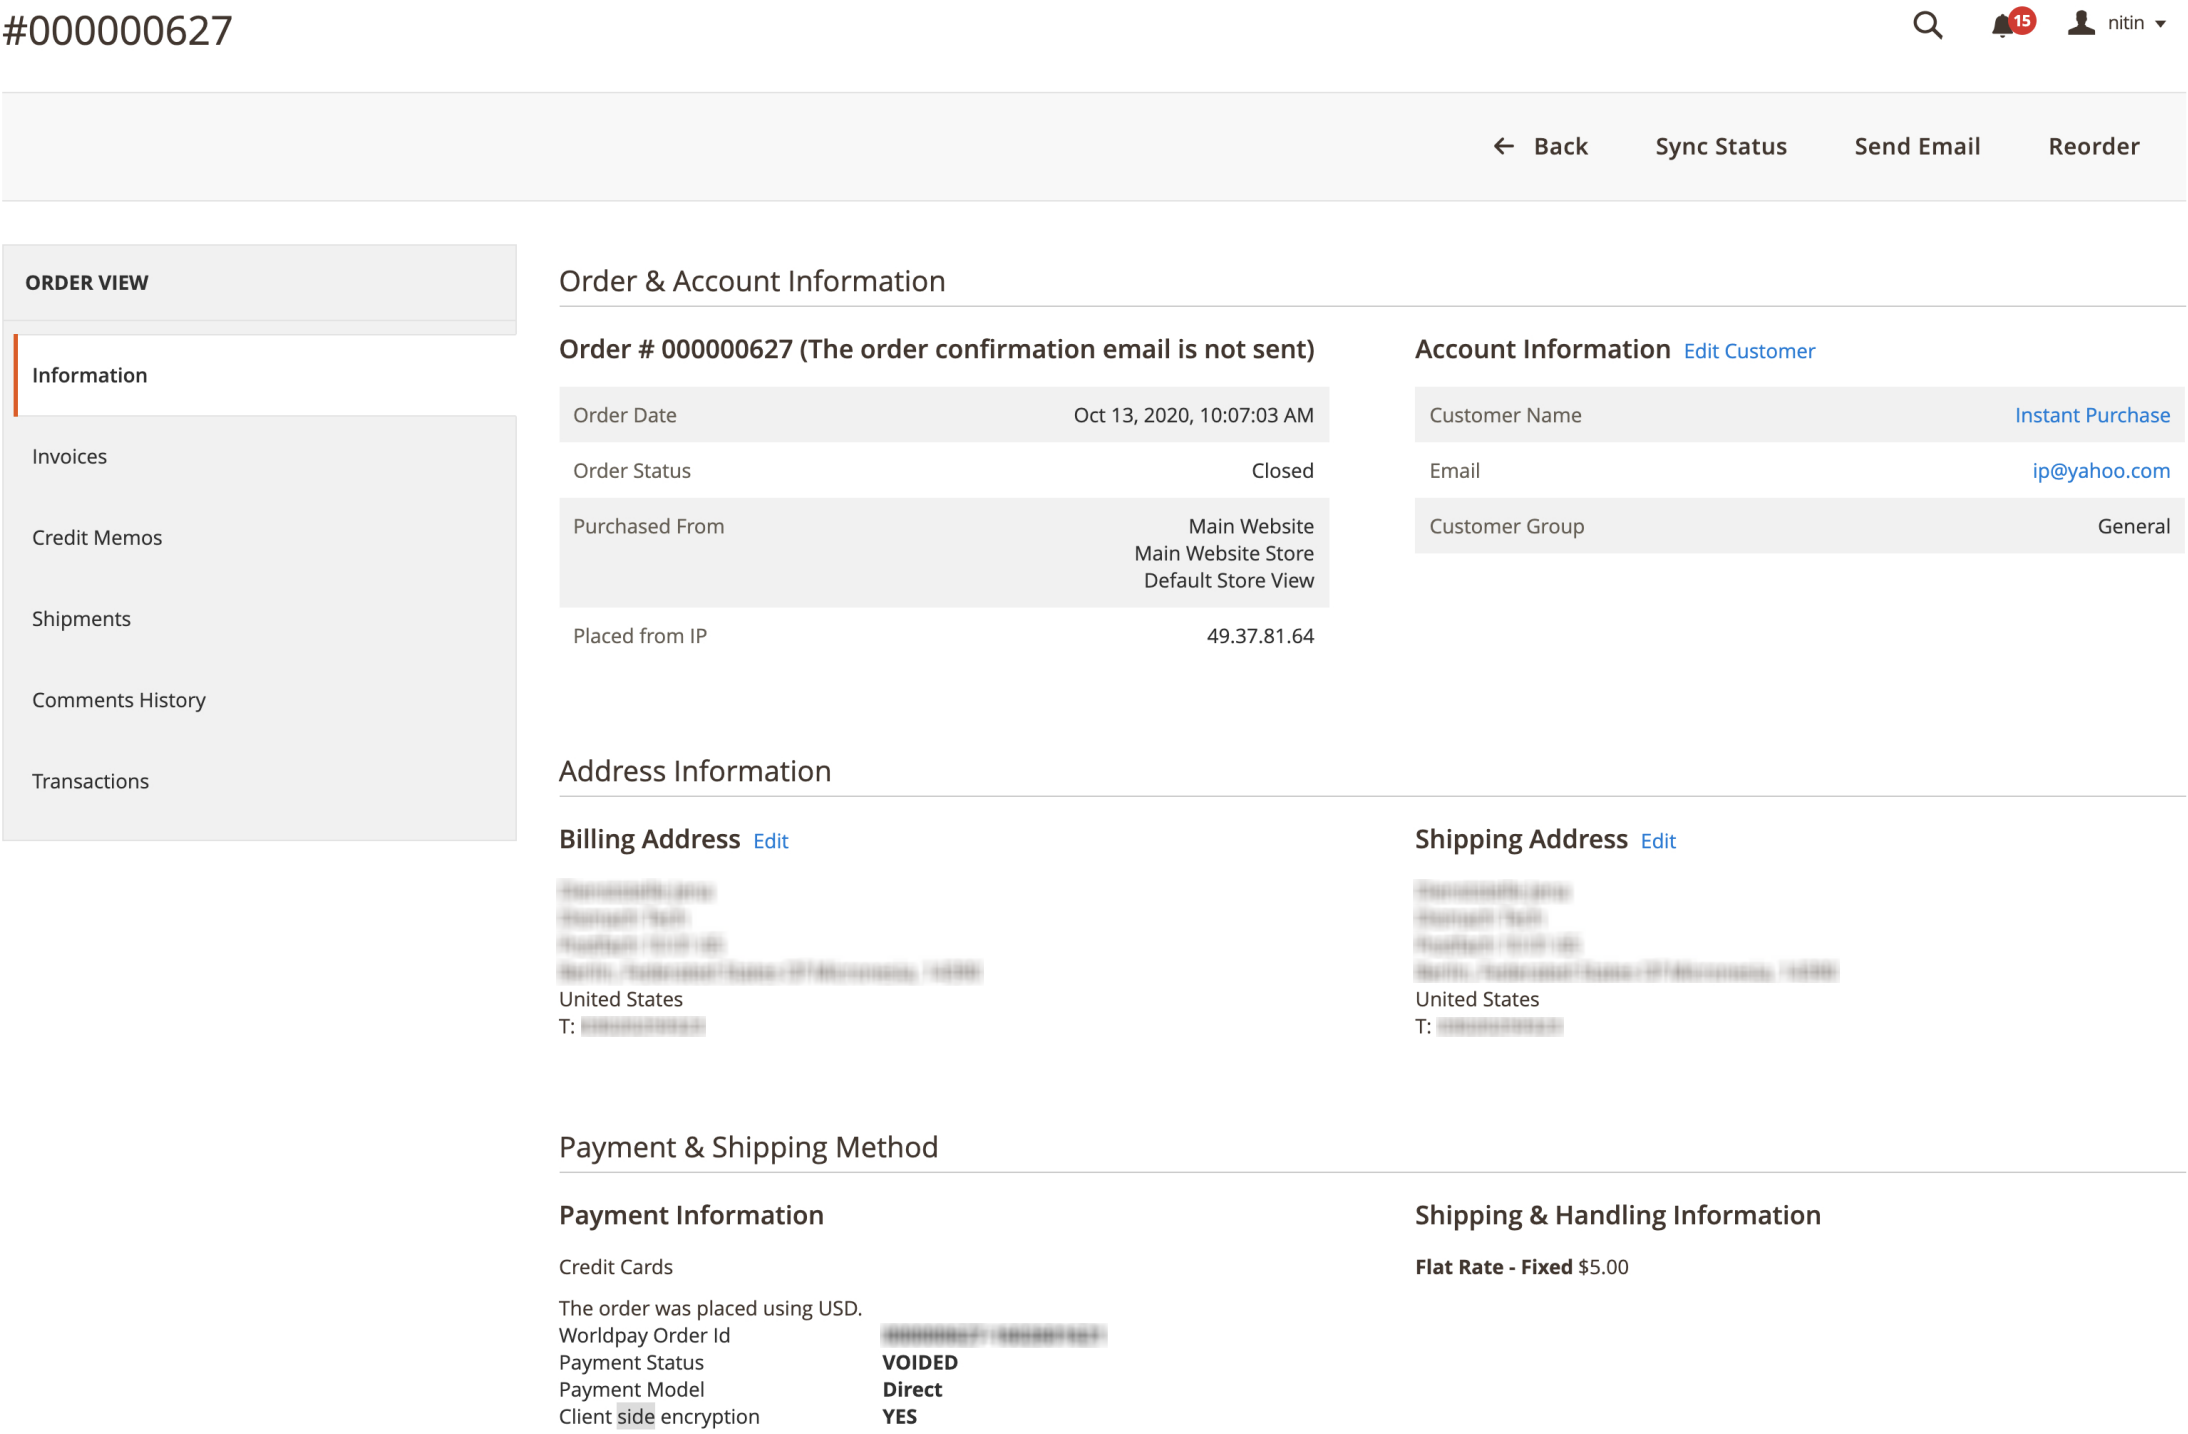
- Go to Sales/Order, and click View.
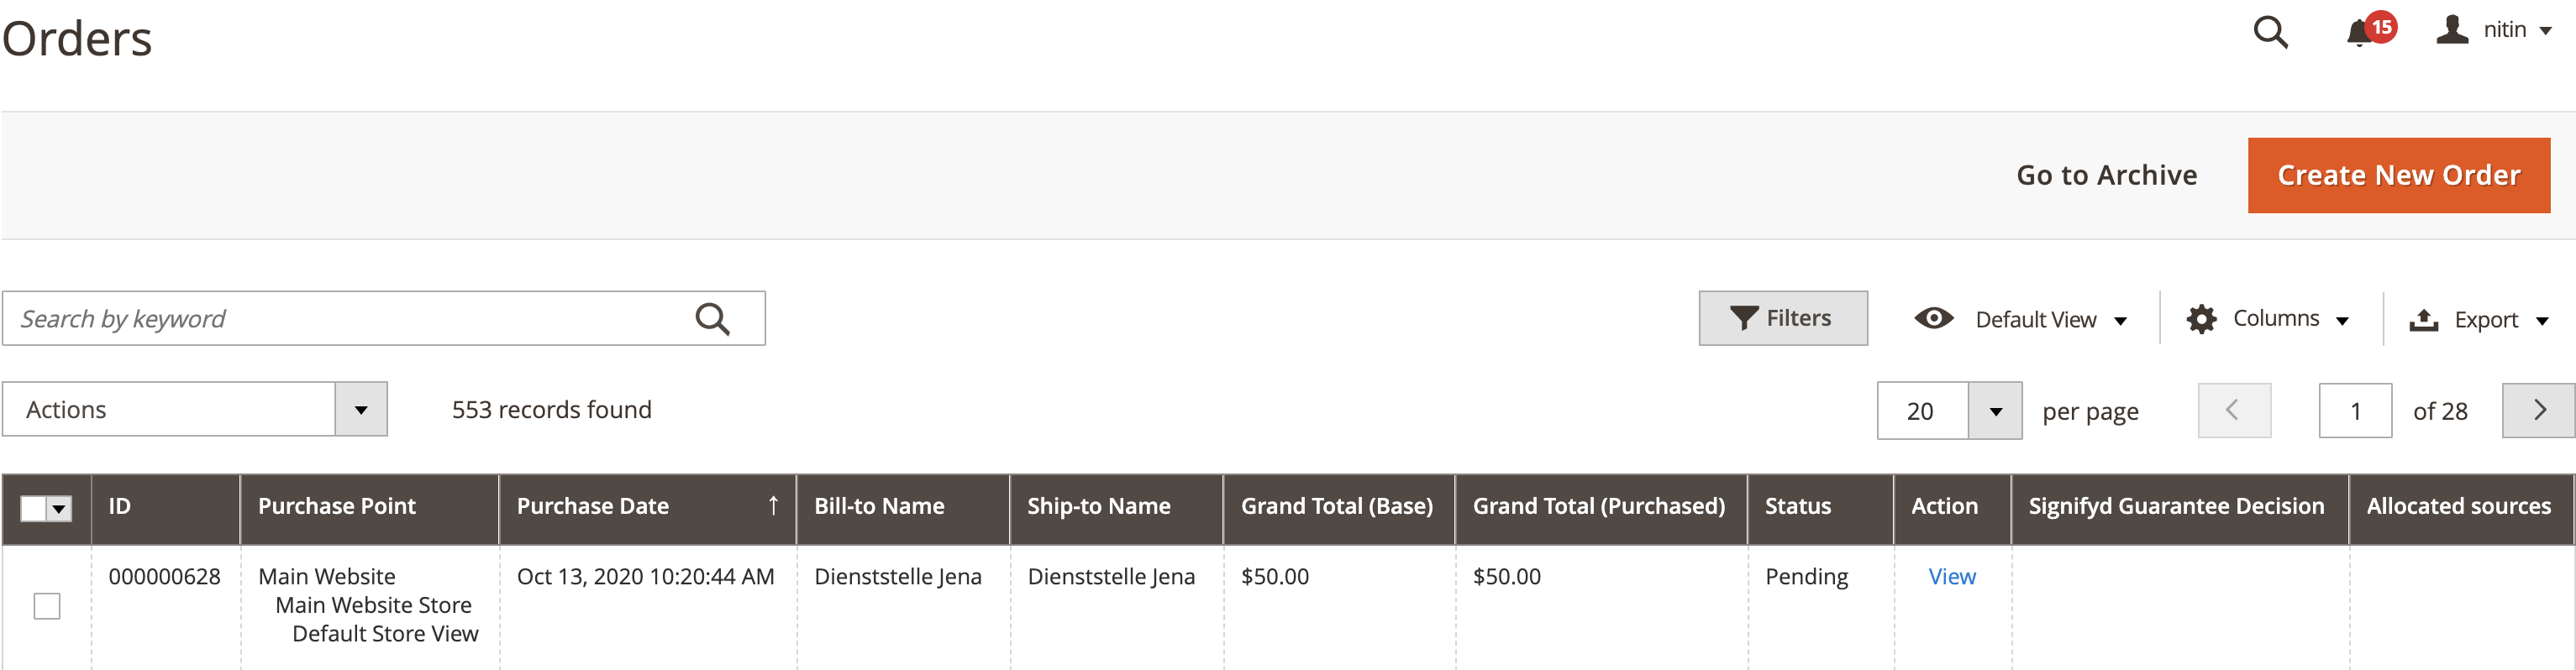
Detailed payment information appears:
ACH direct debit
This section describes how to configure ACH Direct Debit (USA domestic wire transfer) to your integrations.
This is only applicable to the USA. You must have a US domestic bank account to use this feature.
To configure the system for ACH pay, do the following:
- Go to Store/Settings/Configuration/Sales/Worldpay. The Alternative Payment Method screen appears:
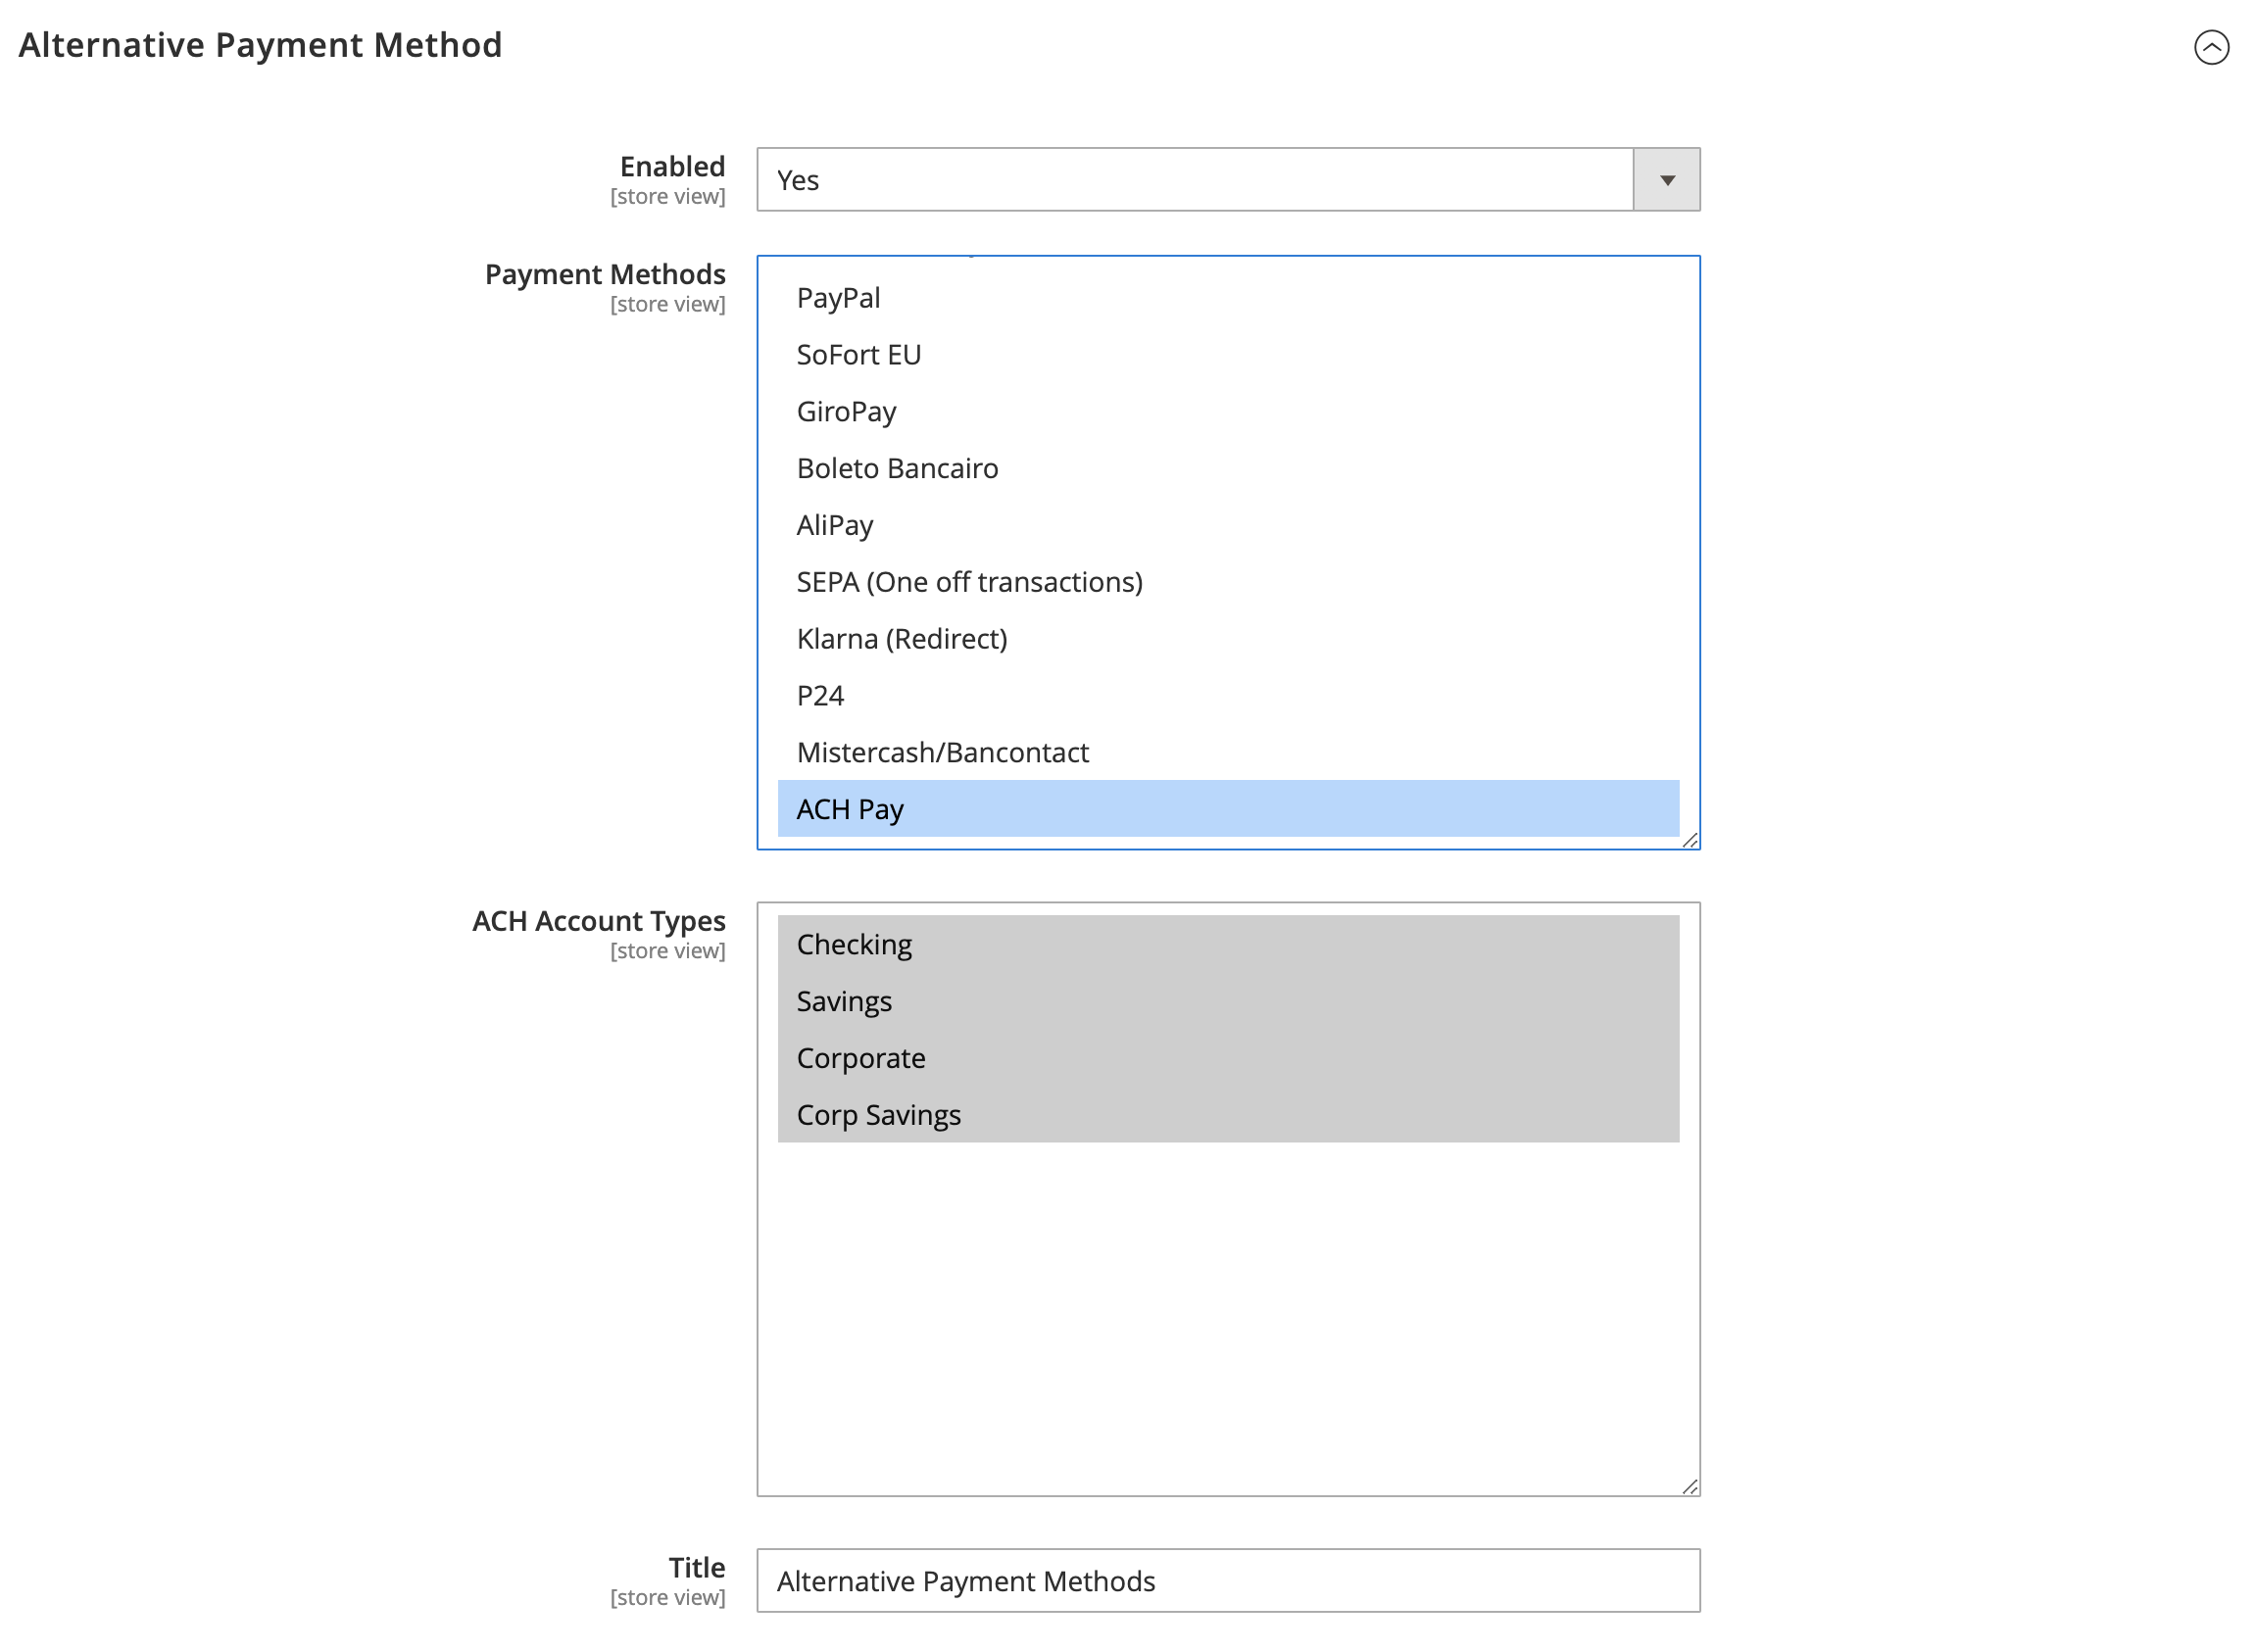
- Use the information in the table below to complete the configuration.
| Configuration | Description |
|---|---|
| Enabled | Set to Yes, this enables an alternative payment method. |
| Payment Methods | Select ACH Pay from the options provided. This feature is only available for USA. |
| ACH Account Types | Configure the available bank account types. |
To add the configuration to manage alerts/show customized messages, do the following:
Go to Store/Settings/Configuration/Sales/Worldpay Exception Codes.
Under Customize Admin Worldpay Configuration Messages, click the Add button and then add the configurations below:

Click Add.
Use the table below to add the configurations in the screenshot above.
| Message code | Actual message | Custom message |
|---|---|---|
| AACH01 | Void Sale action failed! | |
| AACH02 | Void Sale executed Successfully! Please run Sync Status after sometime. |
- Under Customize Checkout Messages, click the Add button and then add the configurations below:
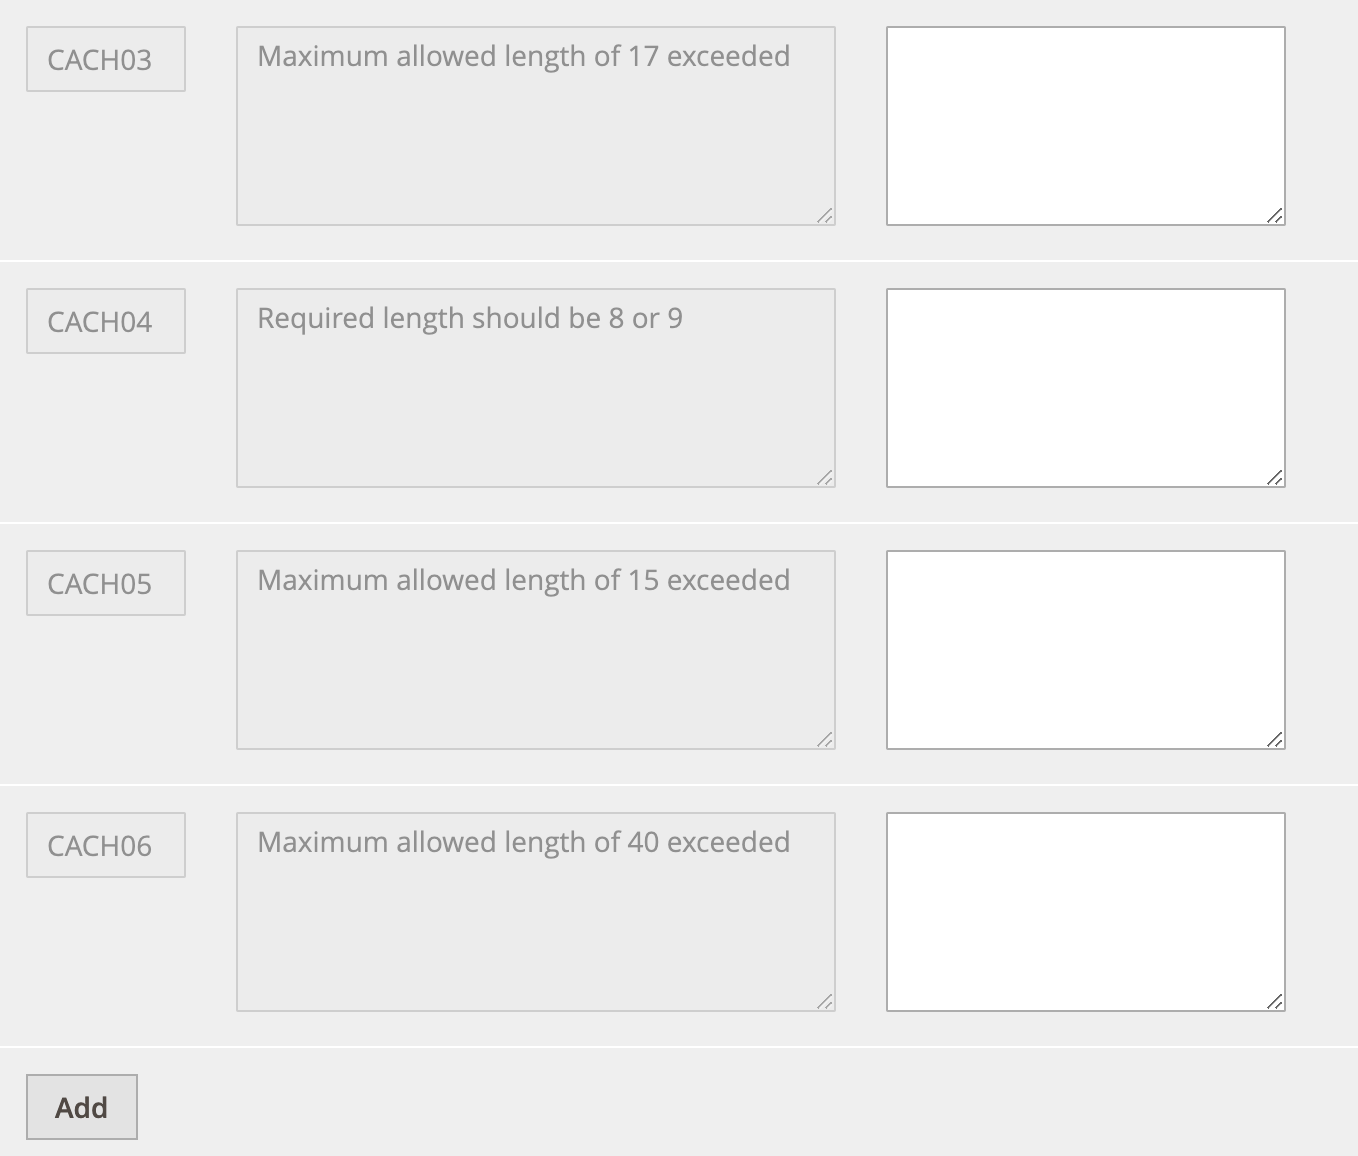
Click Add.
Use the table below to add the configurations in the screenshot above.
| Message code | Actual message | Custom message |
|---|---|---|
| CACH03 | Maximum length of 17 exceeded | |
| CACH04 | Length should be 8 or 9 | |
| CACH05 | Maximum length of 15 exceeded | |
| CACH06 | Maximum length of 40 exceeded |
Void a sale request
In some cases, you may want to void a sale request. You must do this within the same US business day as the sale request.
To void a sale request do the following:
Go to Sales/Orders
Search for the order ID shared by the shopper (For example: 000000504)
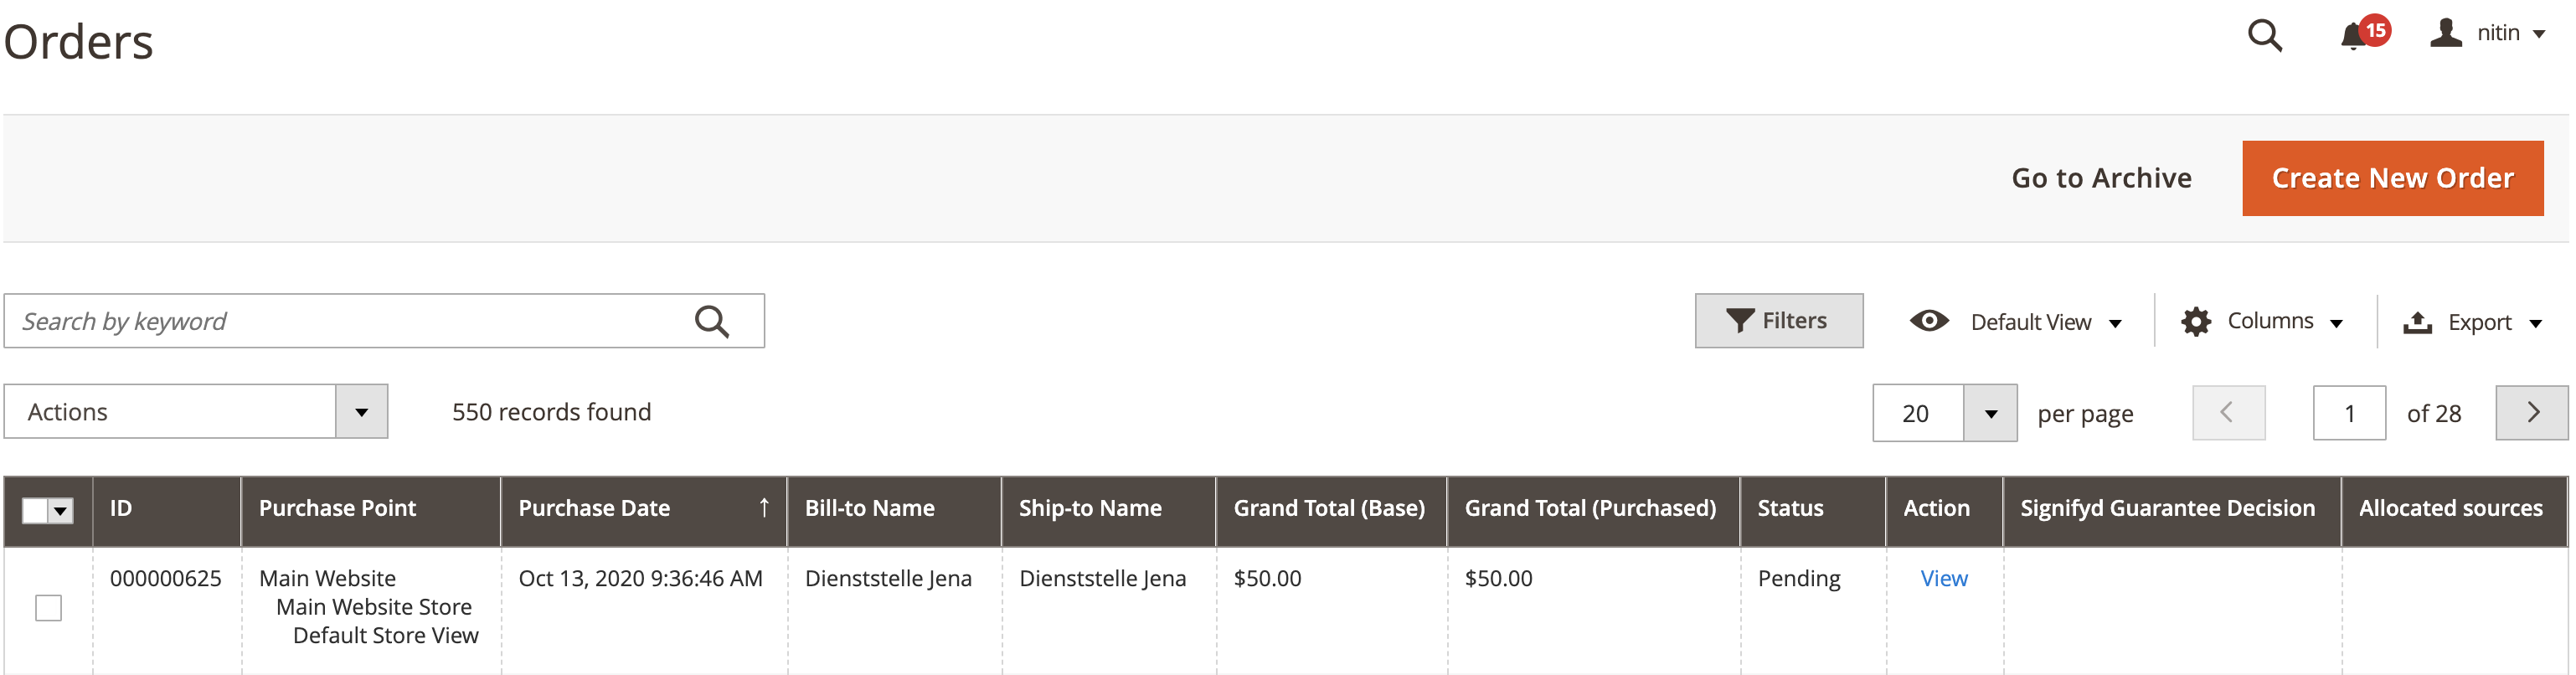
- Click View, and the page below appears with an option to Void Sale. It is between Sync Status and Cancel on the top ribbon.
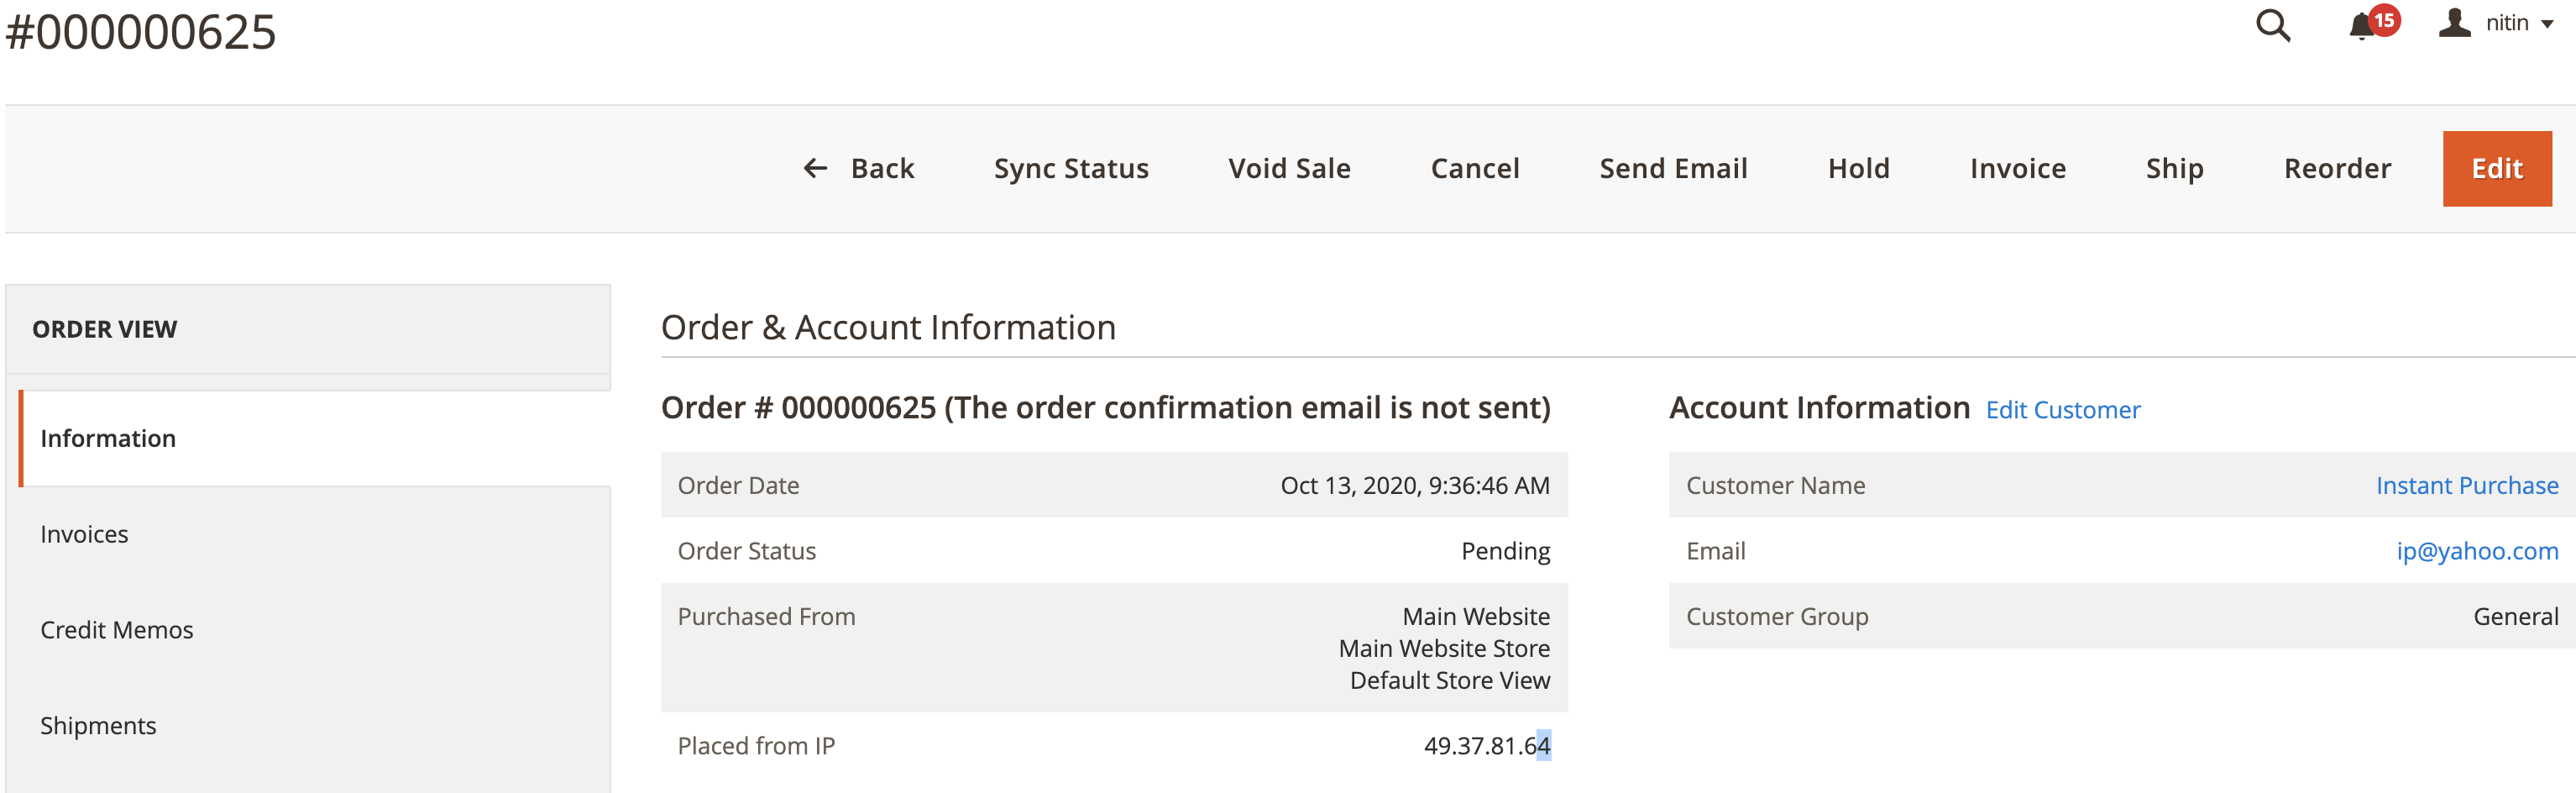
The Void Sale option is only visible on the same US business day as the sale request and only for ACH Pay orders. If you void the sale request, do not send out a refund request from MAI site.
- You must click Void Sale to void a particular sale request. When the void sale action is complete, a confirmation message appears. See the screenshot below.
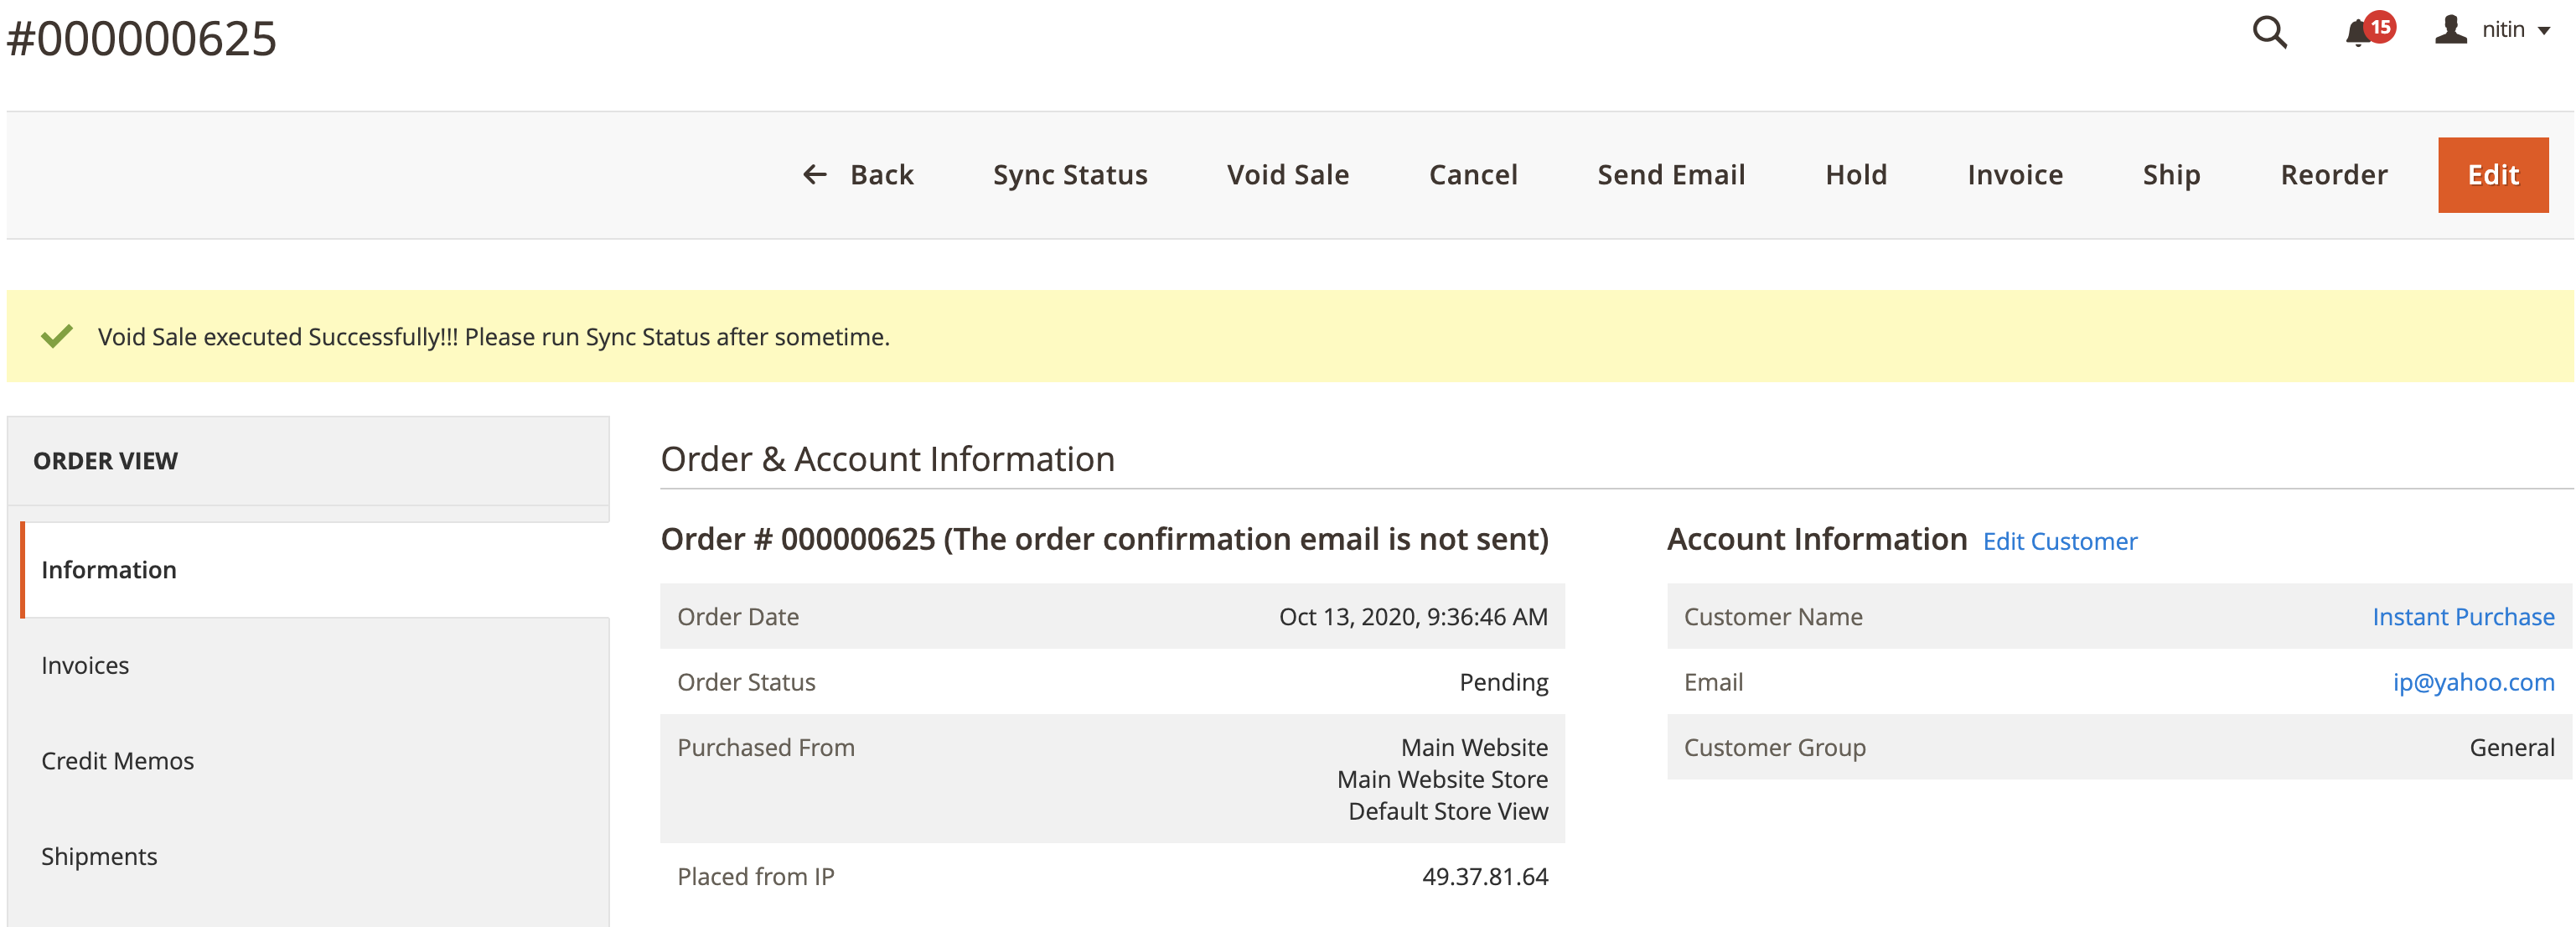
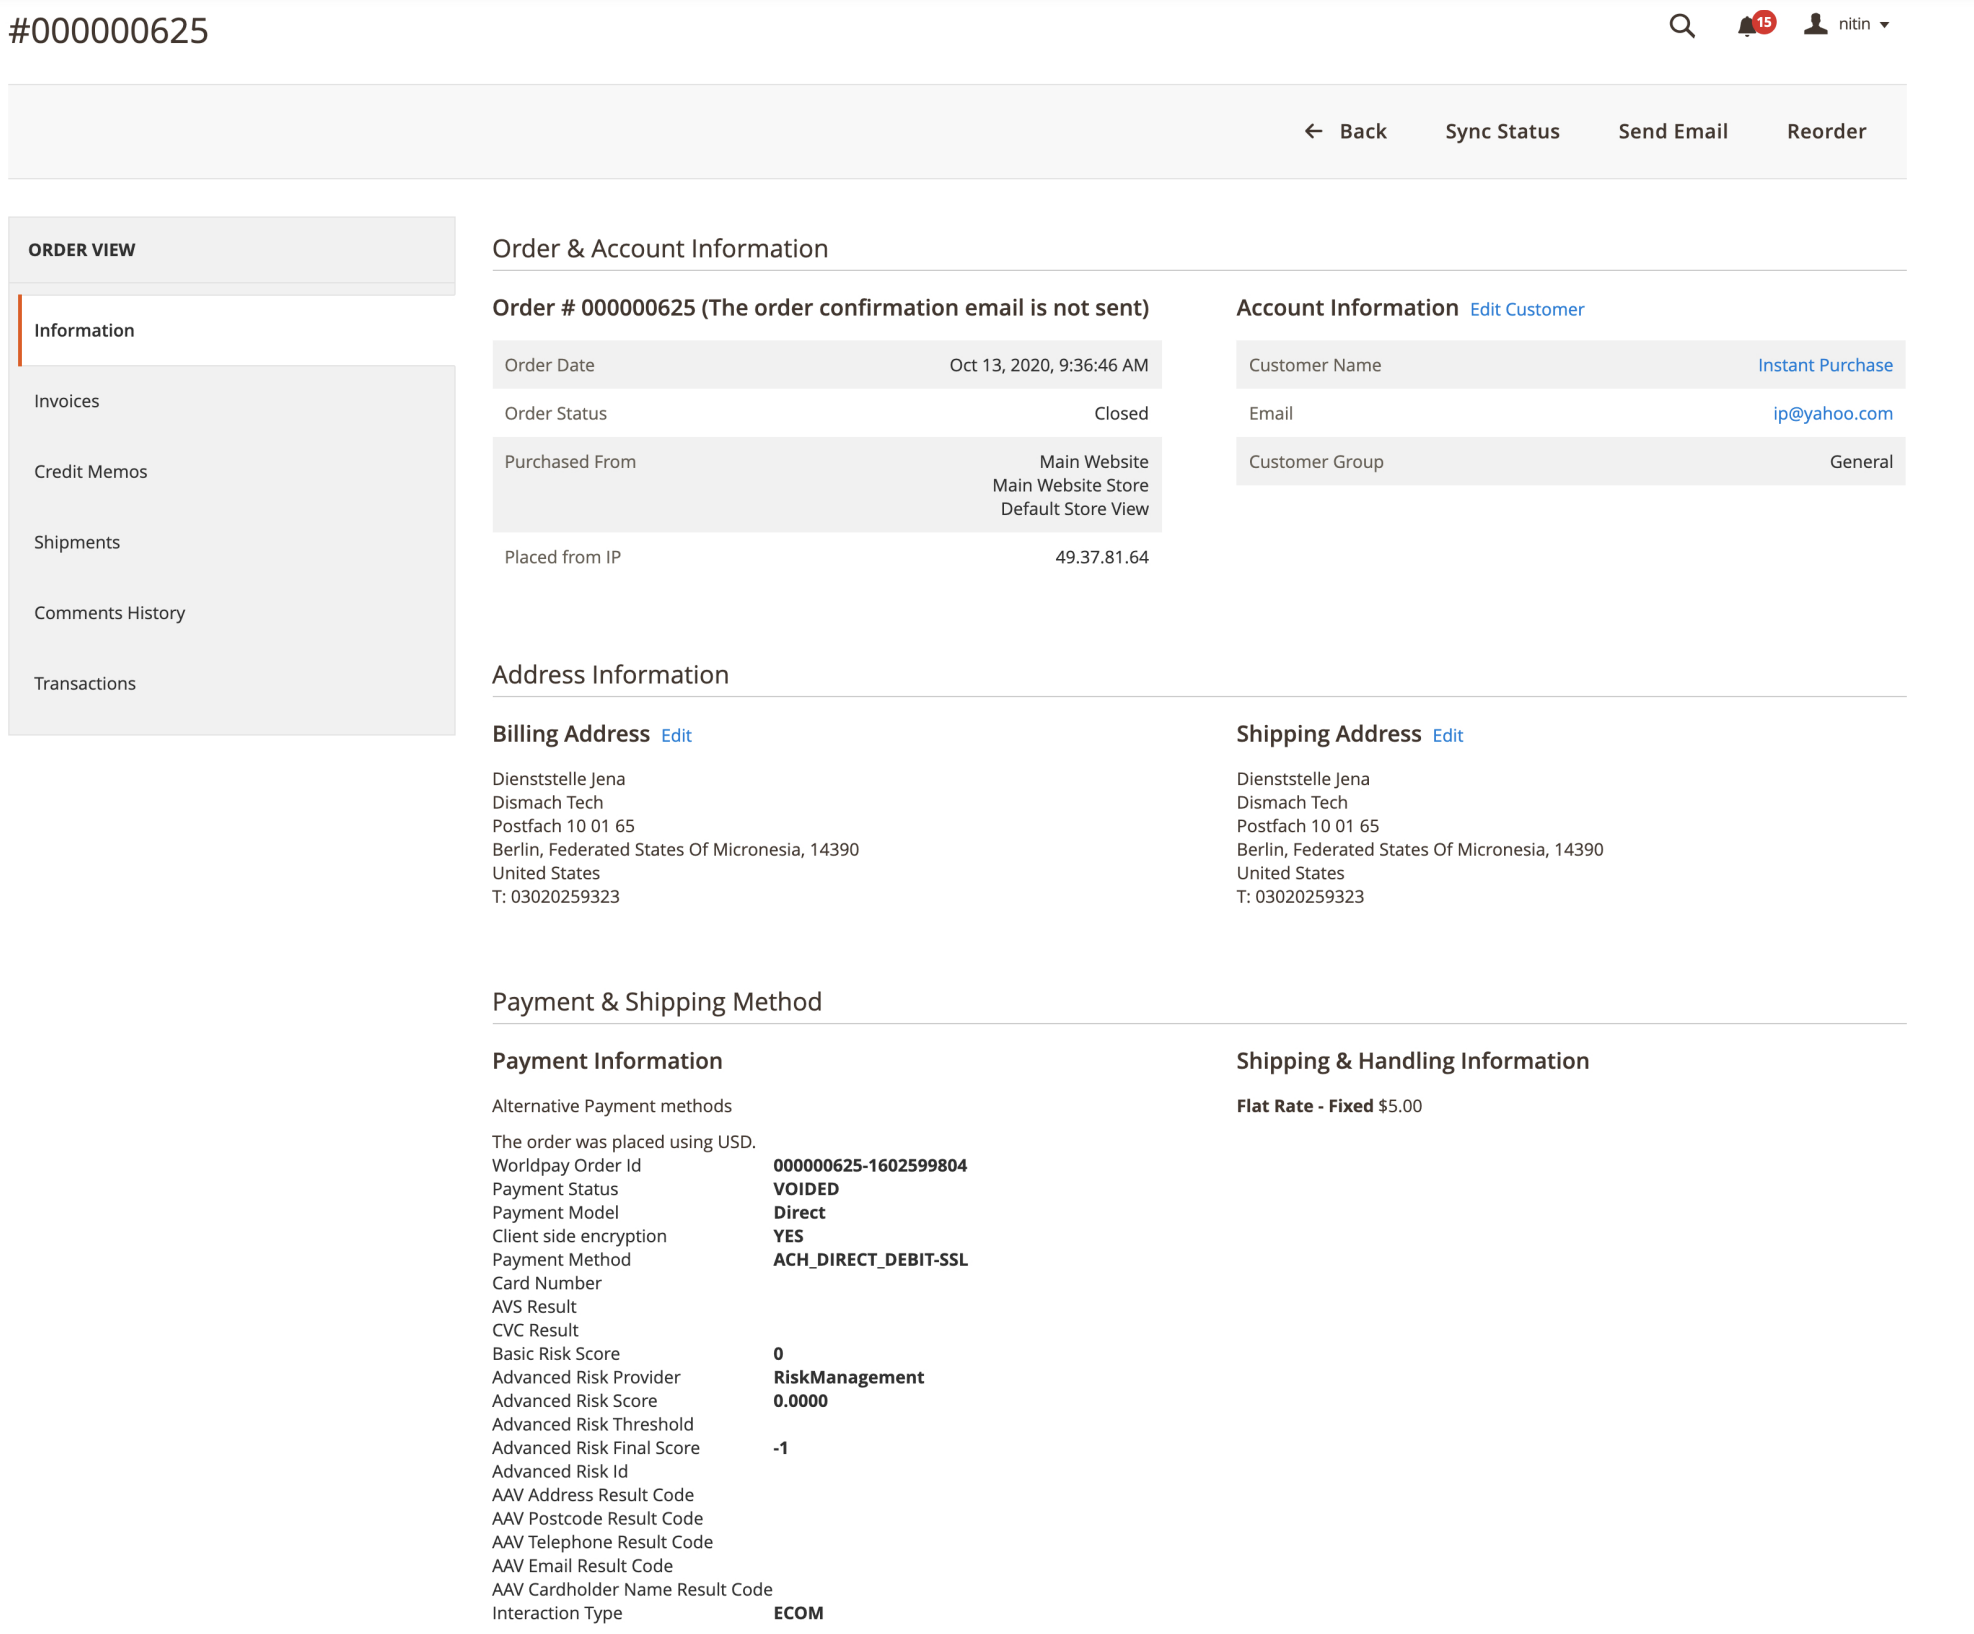
This shows that the void request was successful. After some time you must run the sync status, this will show the current order status as well as payment status. See the screenshot below:
Problems with a void sale request
If you click Void Sale after the request has already been voided, you get an error message.
The error messages may vary depending on the custom messages that are in the configuration. If Void Sale is unavailable or if the request fails, you must submit a refund request.
The shopper's experience
Once you have configured your system, shoppers who select ACH Pay see seven new fields in the alternative payment methods section:
- Bank Account Types
- Account Number
- Routing Number
- Check Number
- Company Name
- Email Address
- Purpose of transaction text box
See the screenshot below:
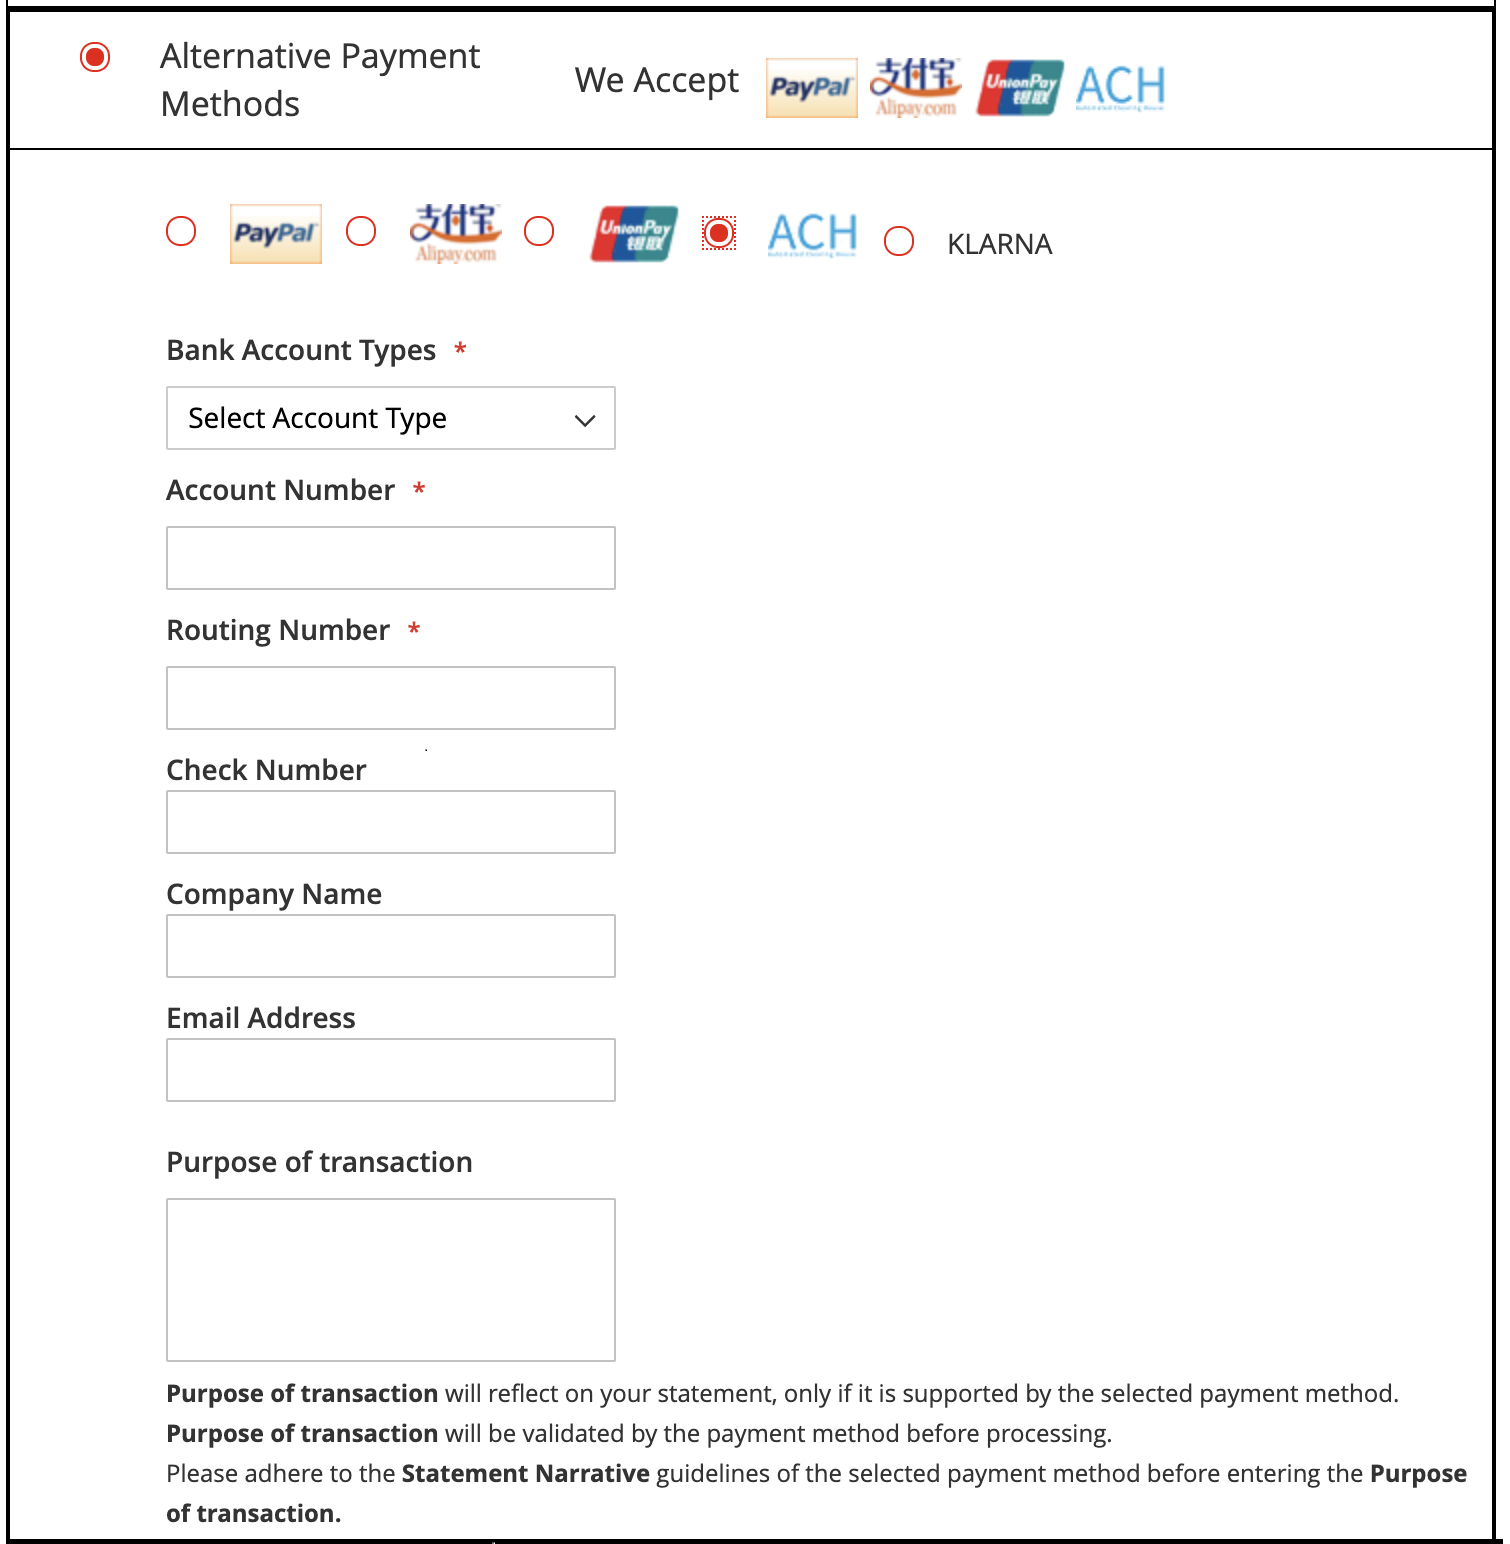
The ACH Pay-specific fields appear once the administrator has enabled them, and if the billing address is in the USA. We describe the fields in the table below:
| ACH Pay specific field | Storefront validation |
|---|---|
| Bank account types | Select box will appear. Values for selection will depend on account types configured by admin. |
| Account number | Accepts only digits up to 17 |
| Routing number | Accepts only digits with minimum length 8 and maximum length 9. |
| Check number | Accepts only digits up to 15 |
| Company name | Accepts string with a maximum length of 40 characters |
| Email address | Accepts standard email validation |
| Purpose of transaction | Accepts alphanumeric characters which will be truncated to 15 characters while sending the request. |
Prime Routing (USA Only)
This section describes how to configure Prime Routing to your integrations.
This is applicable only for USA and works only in direct integration mode. Once Prime Routing is enabled, the request is treated as a sales request.
To configure prime routing, do the following:
- Go to Store/Settings/Configuration/Sales/Worldpay.
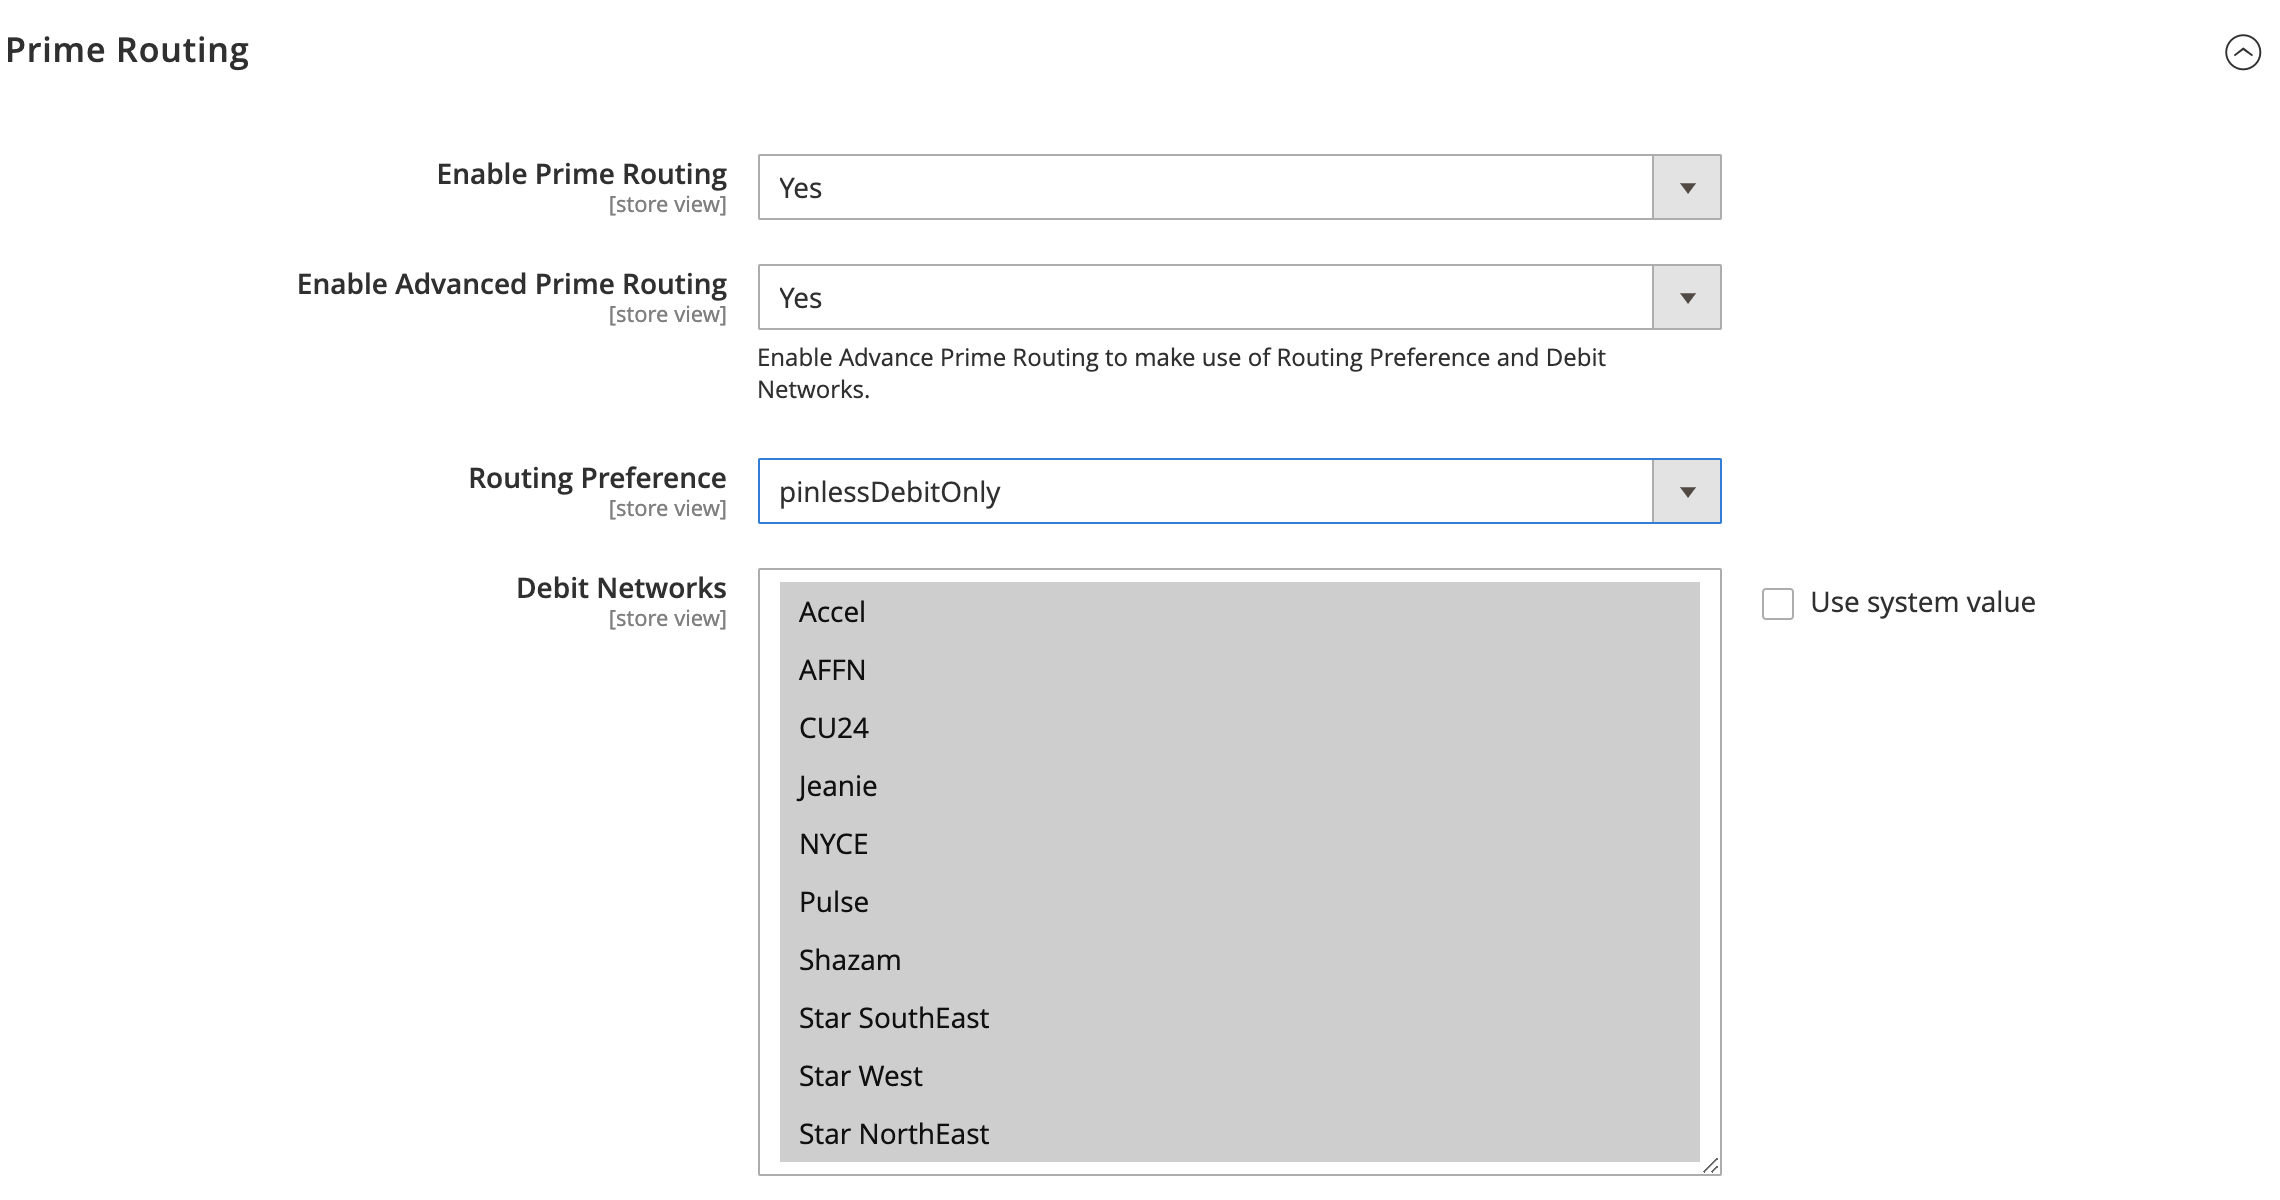
- Use the information in the table below to complete the configuration.
| Configuration | Description |
|---|---|
| Enable Prime Routing | Set to Yes, this enables the prime routing feature. |
| Enable Advanced Prime Routing | Set to Yes, this allows you to configure the routing preference and debit networks. |
| Routing Preference | This lets you configure the routing preference to specify how a particular transaction should be routed. |
| Debit Networks | This lets you configure the debit networks to specify how a particular transaction should be routed. |
Manage alerts or show customized messages
To add the configuration to manage alerts or show customized messages do the following:
- Go to Store/Settings/Configuration/Sales/Worldpay Exception Codes.
- Under Customize Admin Worldpay Configuration Messages, click the Add button and then add the configurations in the screenshot below.
- Click Save Config after you add the configurations.
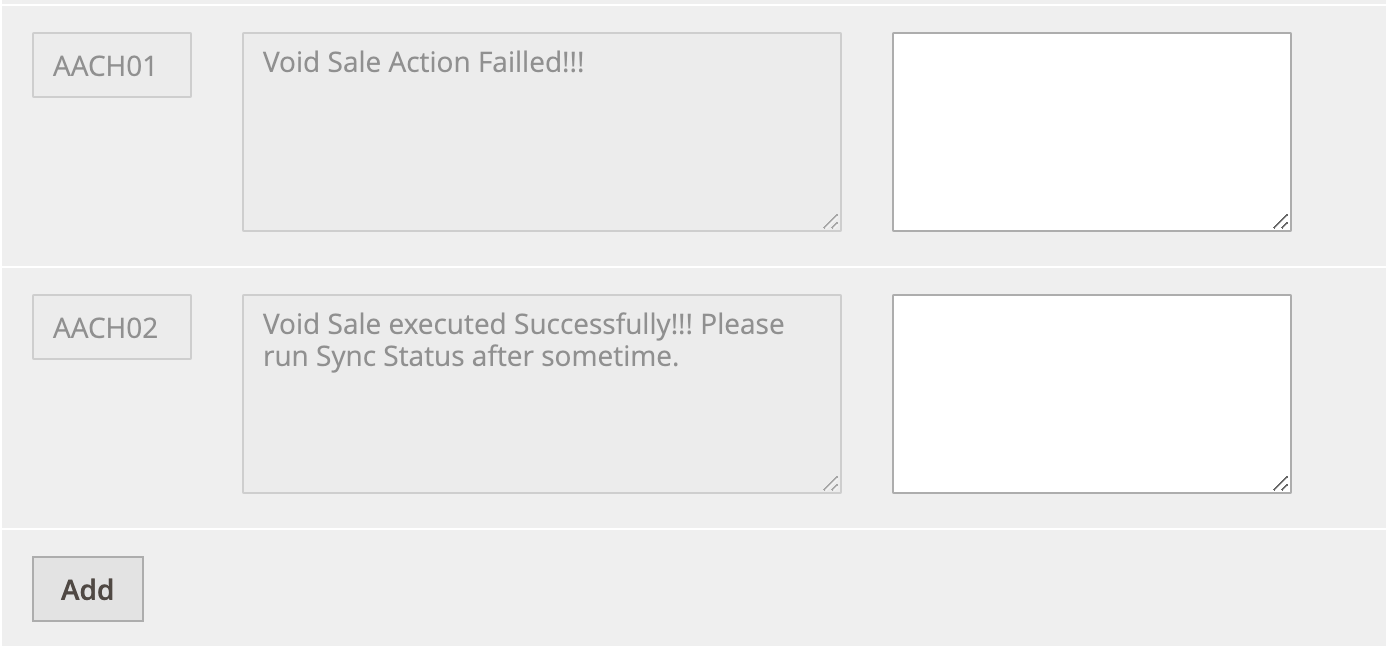
Use the information in the table to add the configurations in the screenshot:
| Message code | Actual message | Custom message |
|---|---|---|
| AACH01 | Void sale action failed! | |
| AACH02 | Void Sale executed Successfully! Please run Sync Status after sometime. |
Customize checkout messages
Under Customize Checkout Messages, click the Add button and then add the configurations below.
Click Save Config after you add the configurations.
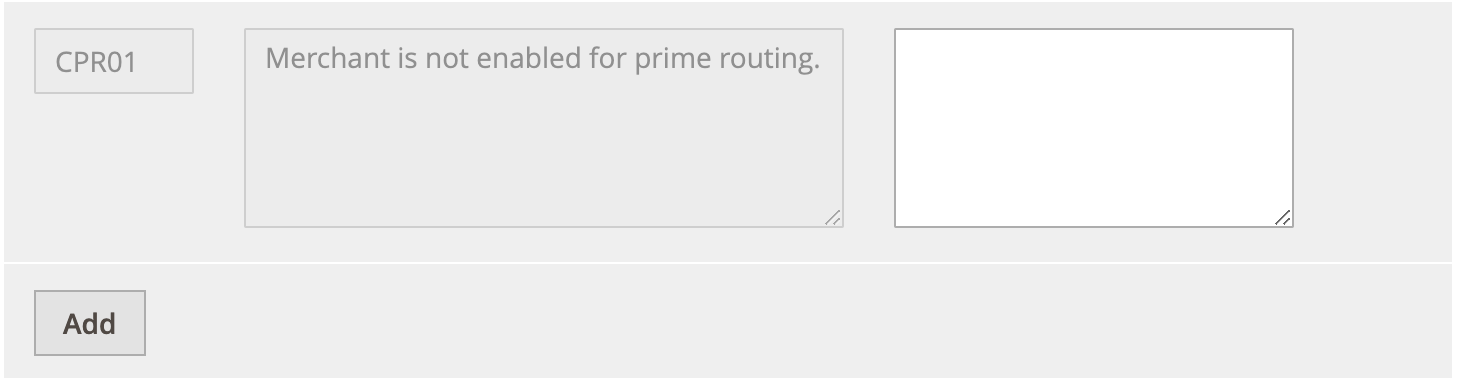
Use the information in the table to add the configurations in the screenshot:
| Message code | Actual message | Custom message |
|---|---|---|
| CPR01 | Merchant is not enabled for prime routing |
Void a sale request
Occasionally you may want to void a sale request. You must do this within the same US business day as the sale request. To void a sale request do the following:
To void a sale request, go to Sales/Orders.
Search for the order ID shared by the shopper (e.g: 000000713.) See screenshot below:

- Click View to open the page below. It has the option to void the sale request.

The Void Sale button is only visible on the same US business day as the sale request and only for ACH Pay orders. If you void the sale request, do not send out a refund request from MAI site.
- You must click Void Sale to void a particular sale request. When the void sale action is complete, a confirmation message appears. See the screenshot below.

This shows that the void request was successful. After some time you must run the sync status, this will show the current order status as well as payment status. See the screenshot below:
Problems with a void sale request
If you click Void Sale after the request has already been voided, you get an error message.
The error messages may vary depending on the custom messages that are in the configuration. If Void Sale is unavailable or if the request fails, you must submit a refund request.
Remember that Prime Routing is available only in direct integration mode. If Prime Routing is enabled the request is treated as a sales request.